| Author |
 Topic Search Topic Search  Topic Options Topic Options
|
R Trim 
Guest


Joined: December 10 2010
Location: Taylorsville
Status: Offline
Points: 22
|
 Post Options Post Options
") Thanks(0) Thanks(0)
 Quote Quote  Reply Reply
 Topic: 50 gal. build Topic: 50 gal. build
Posted: December 29 2013 at 8:37am |
Long story short.... I did fresh water tanks, until the Sylmar, Calif. earthquake in the 70's threw them on the floor... big mess. 2- 30gal, 3- 10 gal. all hit the floor. My son got into salt water tanks and gave me his 30gal to tend while his family went to Oregon. I sorta kept it. He now has a 120 gal. So, this is my first ground up build after years of working with the smaller tank. I'll post photos as as best I can. There's been no rush building. I started planning last year when I built a built-in wall unit in the living room. I committed a space for the tank and refug. under the cabinet. Basic specs so far: - 50 gal. main tank - 20 gal. refug/support tank - Foam and rock back and side walls I'll start with images of the tank build to date. Then add the cabinet images/information and all the plumbing, lighting, etc. Basic in-tank plumbing done. Loc-line will bring the various water directors through the rock. 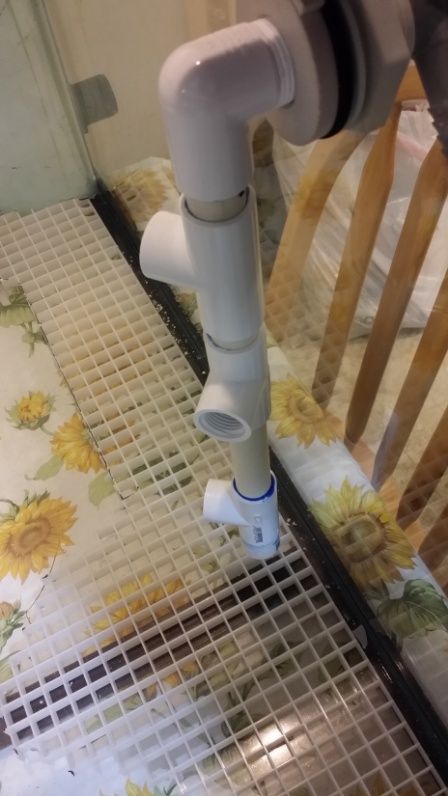 Plastic light fixture grate in place to support the foam and rock. 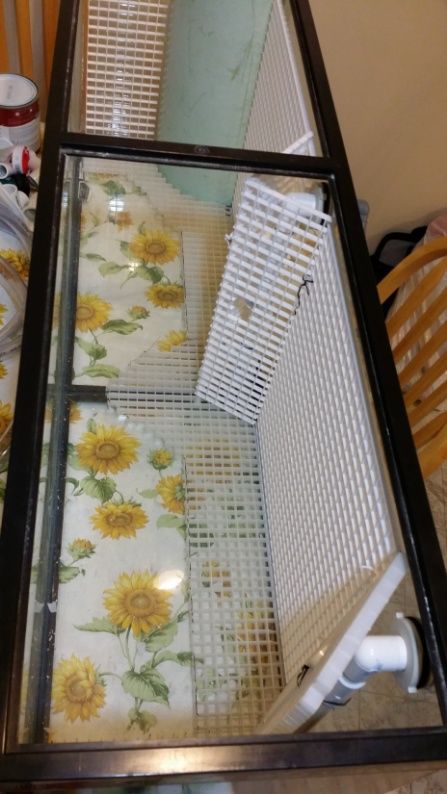 Overflow box built from big PVC drain pipe. I cut it to size and cut the drain slots on a table saw. I'll be using a Dorose (sp?) drain pipe to get water down to the sump. 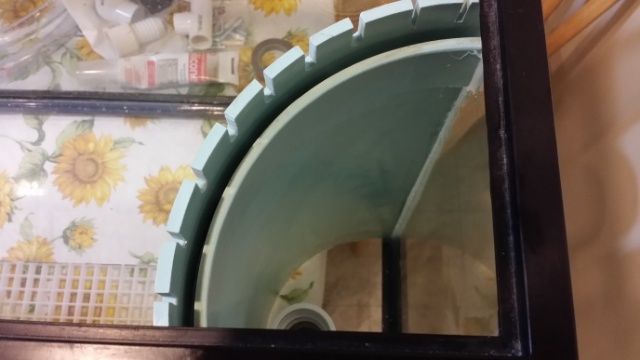 Close in on the grate fitted around the plumbing. 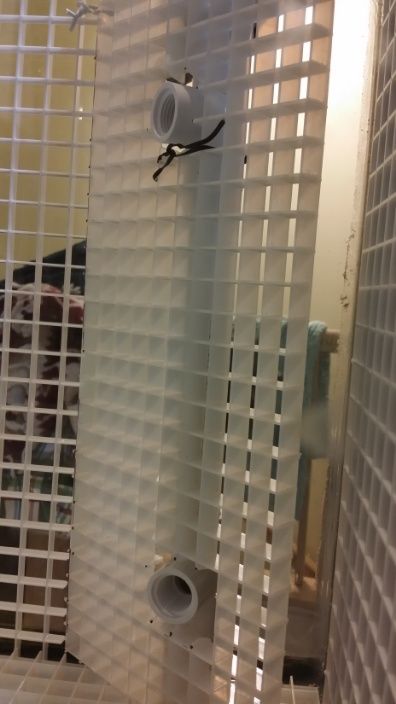 Another angle. 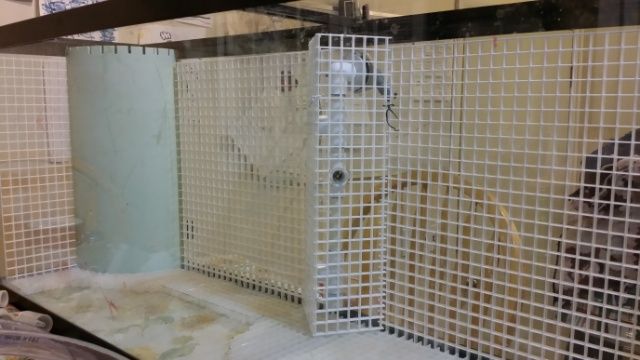 More to come. Sump pump and Loc-line stuff ordered. Bob
|
 |
Mike Savage
Guest

Joined: July 15 2005
Location: Murray
Status: Offline
Points: 19173
|
Post Options
Thanks(0)
Quote Reply
Posted: December 29 2013 at 8:51am |
|
Welcome Bob, I look forward to following your build!
|
|
|
|
R Trim
Guest
Joined: December 10 2010
Location: Taylorsville
Status: Offline
Points: 22
|
Post Options
Thanks(0)
Quote Reply
Posted: December 29 2013 at 8:54am |
The cabinetry build looks like this. All the wood is 3/4" maple with the wrong side of the plywood out. I like figure in my wood and it's all on the 'bad side'. So we flipped it. 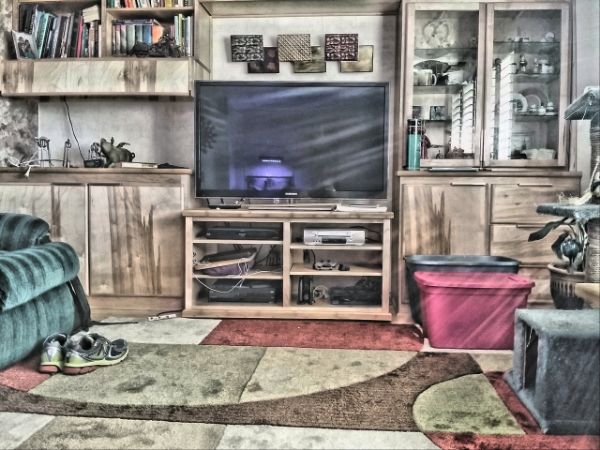 Ok, for you photo buffs, I HDR'd the above image. The tank will go on the left side, where you see the flying pig. The cabinet is structurally sound to 800 lbs. of dead weight... maybe more. It's kinda over-built. It's free span for the doors. No center divider. Below will be a 20 gal. sump and support stuff. The top is 2 layers of 3/4" ply and a layer of 1/2" caramelized bamboo flooring. The top also has a couple of stringers (kinda like floor joices). 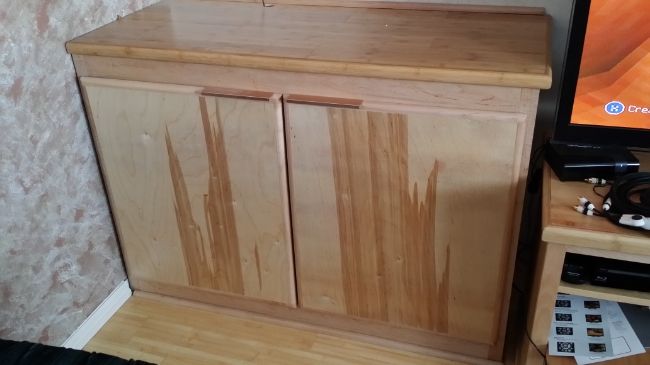 The inside of the cabinet will be painted white plus there will be a vinyl membrane added under the tank to catch a possible overflow of the sump. A separate circuit is being brought in to handle the tank power needs. I'm adding a 5" muffin fan that will blow into the cabinet (filtered) to help mitigate the moisture buildup.  The front of the hood opens to allow access. 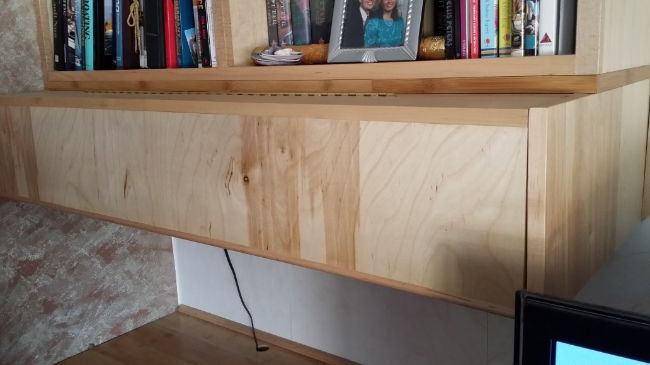 There's 2x48" t-5 tintics right now. 2 rows of mixed color LEDs will be added. 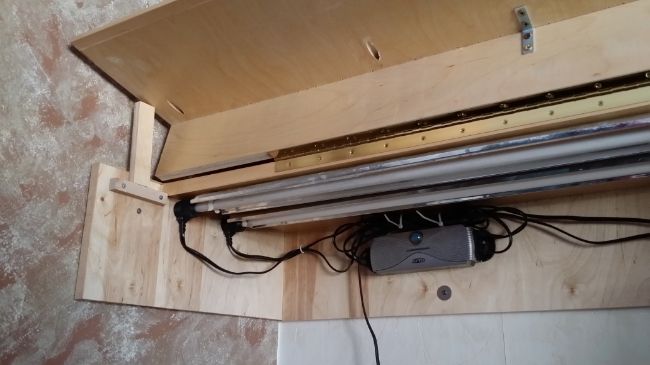 The hood will have a small fan on one end to move hot, damp air out. 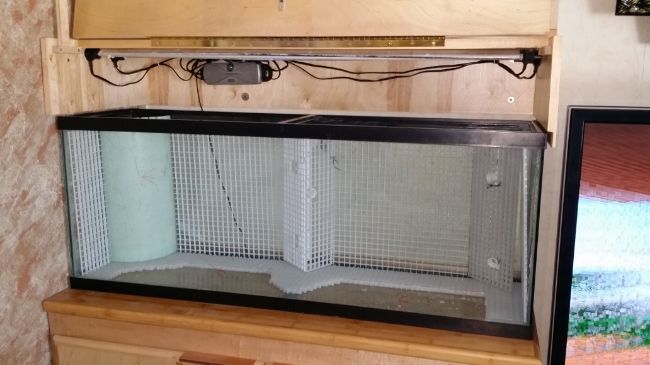 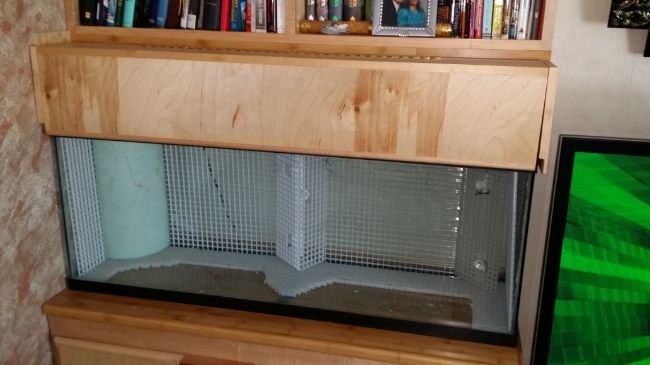 bob
Edited by R Trim - December 29 2013 at 4:28pm
|
|
Scott B
Guest

Joined: March 03 2011
Location: Harrisville
Status: Offline
Points: 343
|
Post Options
Thanks(0)
Quote Reply
Posted: December 29 2013 at 9:00am |
|
Very cool
|
|
28g jbj led nano, 150 g mixed reef, skimz skimmer, AI blue sol's, Reef Angel controller, wp40's, aquamedic reef doser
|
|
R Trim
Guest
Joined: December 10 2010
Location: Taylorsville
Status: Offline
Points: 22
|
Post Options
Thanks(0)
Quote Reply
Posted: February 17 2014 at 5:30am |
The build continues. Made some headway this weekend with my son
visiting. He's really good at letting the 'rock speak to him' for
placement. And it did. It looks really nice. We began stacking the rocks starting with a the key focal point in the middle of the tank. 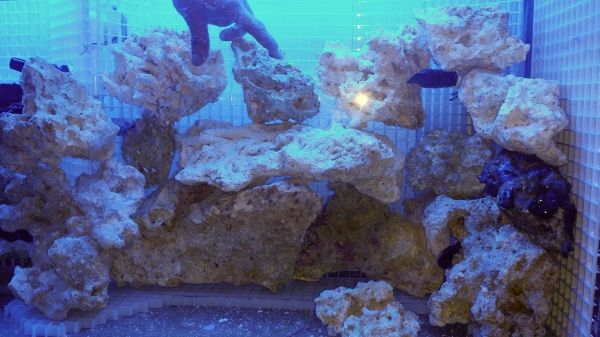 And then the foaming started. Note to self...wear disposable gloves next time. Just sayin' 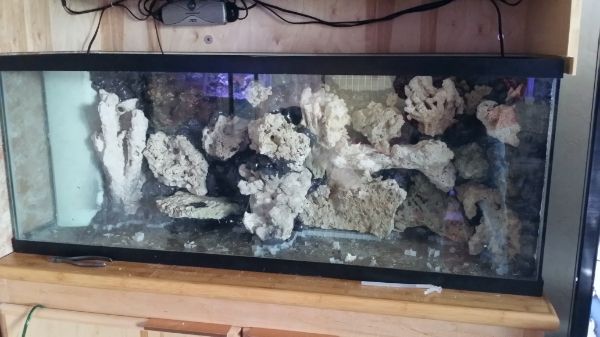 We were able to create some very nice natural caves, passage ways and shelves when the pieces all fit together. Once the foaming was done, the shaping began with a Dremmel with a sanding drum attached. It's fast work to shape this foam. Bit dusty, but not bad. The photo below shows shaping just starting in one area. I'm tending to cutting the foam back quite a bit, then cutting texture into what remains. The epoxy and sand will work it's magic in the final step. 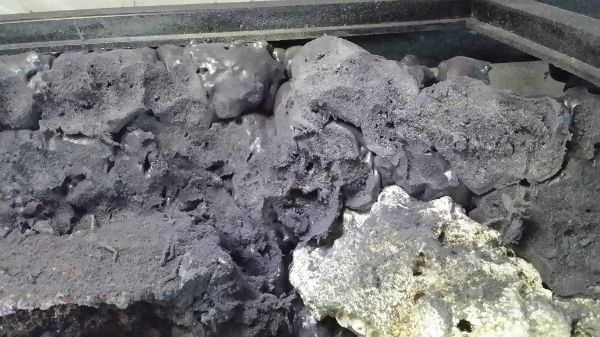 While the foam was drying, we dove into the sump. It's a 20 gal. tank. Simple design with the inflow on the right side and the tank return on the left. 3/16" plexi creates the baffles. Water tested....no leaks between baffles.   Next up is the coat of marine epoxy on the foam with sand embedded.
|
|
Mike Savage
Guest
Joined: July 15 2005
Location: Murray
Status: Offline
Points: 19173
|
Post Options
Thanks(0)
Quote Reply
Posted: February 17 2014 at 7:54am |
|
That is coming along quite well Bob!
|
|
|
|
R Trim
Guest
Joined: December 10 2010
Location: Taylorsville
Status: Offline
Points: 22
|
Post Options
Thanks(0)
Quote Reply
Posted: December 27 2014 at 8:46am |
Oh, it's been a spell since I posted anything about this build. Sorry. The project just sat and sat until the travels to Europe, and the semester was done. But things have moved quickly in the past 2 weeks. Here's an update.
Power was pulled from a separate 20amp breaker in the garage. Sump placed and tubing ruffed in. I put a vinyl 'shower pan' material under the sump and lapped it up the sides 5". Ultimately for a bigger leak or spill, it has already been handy for filling and dinking around while setting stuff up. I also painted the inside of the cabinet with outdoor, gloss white paint to protect the wood.
The sump installed and filled. Lots of tweaking since this photo, but it give an idea of what's going on. The big issue has been water flow. To much for the teeth I cut in the baffles. So I've been dremmeling them wider and deeper, trying to find the optimal size for the flow.
Bob
|
|
R Trim
Guest
Joined: December 10 2010
Location: Taylorsville
Status: Offline
Points: 22
|
Post Options
Thanks(0)
Quote Reply
Posted: December 27 2014 at 9:07am |
Water in the tank... ready for pump start. Can you say 'leak check'! it passed the check.
The tank fill was done 3 weeks ago. The bloom is doing nicely.
I put a Xenia in a week ago to see how it would react. So far, so good. Have 5 crabs doing cleanup and they are happy. I have done one 10gal. water change. Testing the levels today.
To split the water flow between the two tank inlets, I used a hose bib splitter. This works great and allows me to tweak the flow on each inlet (tank center and tank right). Eventually I'll get a wave maker thing to cycle between the two and change the flow control.
The tank hood has 2- 48" Florescent bulbs (1- 12k and one Atintic). I'm building a LED light bar to go towards the front of the tank. 14 LEDs. 8 are 3 watt blue + Red, and the rest are 12k whites. 1/4 wall alum. tubing used as a heat sink along with a small (1") fan that will be attached to the end of the tube to move heat out of the tube. I'll have more photos of this soon, as the build progresses.
I've also built a 6 x 3watt LED light fixture for the sump.
Both the hood and the lower cabinet have 80mm computer fans venting air out of the cabinets. They are super quiet, 24cfm units. No need for a huge air mover, just enough to move the air a bit.
So there we have it, as of Dec. 27th. Hope the thank settles down soon. My son is moving from Vernal here, and tearing down his 110g tank. His stuff needs a home until he gets his back on line.
Bob
|
|
LaRue
Guest
Joined: June 18 2013
Location: Roy
Status: Offline
Points: 907
|
Post Options
Thanks(0)
Quote Reply
Posted: December 27 2014 at 9:19am |
|
I would be worried about those hose clamps they are going to rust and cause problems for your corals.
What did you do to break your siphon on your returns in case of power outage?
|
|
R Trim
Guest
Joined: December 10 2010
Location: Taylorsville
Status: Offline
Points: 22
|
Post Options
Thanks(0)
Quote Reply
Posted: December 27 2014 at 9:44am |
They are stainless but they will be replaced with something else. In the earlier photos you see the PVC tank return lines... I drilled holes in the elbows at the top of the return. I cycled the tank pump half a dozen times to see if the sump 'head room' was as planned. It worked. The tank drain on power off, stops 1/2" from the rim of the sump.
On the bio side of things, I seeded the tanks and sump with live sand from my 30gal. and 5 gals of water plus added live rock to the sump and dosed with NutraFin 'Cycle'. Maybe not the best additive, but it jump started the tank, fast.
Bob
|
|
R Trim
Guest
Joined: December 10 2010
Location: Taylorsville
Status: Offline
Points: 22
|
Post Options
Thanks(0)
Quote Reply
Posted: December 27 2014 at 3:19pm |
Just tested the water. Spot on on all parameters. Nice! Added 10 more crabs and 5 snails. Take that over active tank cycle growth.
Bob
|
|
LaRue
Guest
Joined: June 18 2013
Location: Roy
Status: Offline
Points: 907
|
Post Options
Thanks(0)
Quote Reply
Posted: December 27 2014 at 9:43pm |
|
Sweet it's looking good. Keep the updates coming.
Edited by LaRue - December 27 2014 at 9:44pm
|
|
R Trim
Guest
Joined: December 10 2010
Location: Taylorsville
Status: Offline
Points: 22
|
Post Options
Thanks(0)
Quote Reply
Posted: December 28 2014 at 7:23am |
Got the LED sump light built/proto-typed and working. 4 -12k white and 2- Blue-red-blue LEDs. All 3 watt'rs. Testing 30 degree lenses to see if I like what they do. 
The mounting plate is 1/4" aluminum with a thermal-coupled heat sink on the back. After 2 hrs the whole mounting was rather warm. Adding a CPU fan to pull off the heat.
The biggest design issue with this LED DIY thing is that the whites have a forward voltage of 3.2v. The Blue-Red combos are 9-11v. Both have different mA draws. All are run off a 12v power supply. If I were to do it again, I'd get a 24v (or there a bouts) power supply so I could put the Blues in series instead of parallel. However, in parallel, I don't need a voltage dropping resistor. The voltage across the 2 blues is 9v. Nice. It should be about 12v but the internal design of these LED beads is different than most. Two 1 watt blues and one 1 watt red, in the middle. It's 300 mA draw tells me they are doing some different wiring of the 3 LED emitters inside. All in all, just makes the stuff hard core DIY'ers love to solve. They do run hotter! than the same wattage whites.
I'm sure someone is going to ask about the piece of PVC pipe at water level in the sump. I was getting a lot of surface bubbles. This held them back unit they could dissipate.
So far... life is good for the new build.
Bob
|
|
Mike Savage
Guest
Joined: July 15 2005
Location: Murray
Status: Offline
Points: 19173
|
Post Options
Thanks(0)
Quote Reply
Posted: December 29 2014 at 8:15am |
|
I really like the look of the aquascaping.
|
|
|
|
R Trim
Guest
Joined: December 10 2010
Location: Taylorsville
Status: Offline
Points: 22
|
Post Options
Thanks(0)
Quote Reply
Posted: July 22 2015 at 3:29pm |
Here's a tank update. It's been months of ups and downs with the tank...as would be normal for a new tank.
Had a horrific long hair algae problem traced down to a bad 4th state RO filter that was contaminated. Now I can't shake the cyano algae problem now. Tried about everything. Water changes, phos-guard in the refuge tank now. Upped the water flow in the tank with 2-800 gph heads. Running a protein skimmer.
Dip stick checks on the water look fine. Not the most accurate but nothing is way out of range.
Tank runs about 78-80 degrees. I don't have a chiller to use if bringing down the temps might help.
All softies are really lathargic. The zenias are closed up and pulled back. The large green mushrooms don't open fully. The Rose anemones are opening but not growing.
Lighting is a full spectrum LED with adjustable balance between white and blue light.
Any thoughts? I'm at a loss.
Thanks Bob
|
|
millsu2
Guest

Joined: April 26 2014
Location: Lehi
Status: Offline
Points: 46
|
Post Options
Thanks(0)
Quote Reply
Posted: July 22 2015 at 4:00pm |
I think you may have a dinoflagellate problem. I had that once and it lasted for 2-3 years. Every time I though I had it almost under control it would flare up again. I didn't know about dinoflagellates at the time, so I was treating it like regular algae and that doesn't seem to work. I actually never did get rid of it. I moved and didn't set that tank back up because i was so frustrated with it.
If it is dinoflagellates, I would recommend keeping the ph high, using phosphate remover, using activated carbon, and a 72 hour blackout period all at the same time. Maybe even dose hydrogen peroxide. Then probably do a water change. This site gives more detail: http://www.reefaquarium.com/2013/dealing-with-dinoflagellates/
My current tank started having problems with this and I followed the instructions on that site and it seems to have taken care of the problem.
|
|
bstuver
Guest

Joined: April 17 2006
Location: Provo
Status: Offline
Points: 9379
|
Post Options
Thanks(0)
Quote Reply
Posted: July 22 2015 at 4:30pm |
|
I would agree with the above on it looks like a dino problem but I've fortunately never had that issue so can't say for sure.
|
|
Jackie Stuver
"wait these aren't the happy Hawaiians oompa doompa godly heaven on your face zoas? I dont want them then. lol!" Ksmart
|
|
catchoftheday
Guest
Joined: September 01 2014
Location: Saratoga Spring
Status: Offline
Points: 521
|
Post Options
Thanks(0)
Quote Reply
Posted: July 22 2015 at 5:11pm |
|
I had it really bad what I did was lights out for 3 day I did s completely black out I wrap the tank with cardboard and it was the best thing I ever did
|
|
I currently have a 24 gallon JBJ all in one tank has two powerheads a phosphate reactor with the small bubble skimmer it is also powered by 2 X165 W LEDs and as a mixed reef
|
|
Adam Blundell
Presidency


Joined: June 24 2002
Location: Davis County
Status: Offline
Points: 18526
|
Post Options
Thanks(0)
Quote Reply
Posted: July 22 2015 at 7:27pm |
I take it you've added some live rock and live sand? I'd keep the lights on. Maybe add phytoplankton as well.
Adam
|
|
Come to a meeting, they’re fun!
|
|
R Trim
Guest
Joined: December 10 2010
Location: Taylorsville
Status: Offline
Points: 22
|
Post Options
Thanks(0)
Quote Reply
Posted: July 23 2015 at 10:32am |
Tank blacked out. PhosGuard and charcoal bags in the sump. Adam: the rock aquascaping was dead rock but live rock and live sand was added to the sump. The tank cycled nicely. Everything was a happy camper until the onset of the long hair algae and not this other stuff. I have dosed with phytoplankton for the past months hoping to help the corals.
We'll see what comes of this next regiment. Thanks for the input all. Mucho appreciated.
Bob
|
|


