speyside's new 90 gallon reef build!
Printed From: Utah Reefs
Category: Main
Forum Name: Tank Threads
Forum Description: A place to show off your tank build.
URL: http://www.utahreefs.com/forum/forum_posts.asp?TID=82894
Printed Date: August 01 2026 at 12:39am
Software Version: Web Wiz Forums 12.03 - http://www.webwizforums.com
Topic: speyside's new 90 gallon reef build!
Posted By: speyside712
Subject: speyside's new 90 gallon reef build!
Date Posted: July 20 2017 at 12:21am
|
Hey everyone, I am building a new reef tank and wanted to share my experiences both in building that reef, and what I've learned getting to this point. This is the 4th tank I've had. I've learned a lot along the way but have lots more to go. Feel free to chime in with ideas and suggestions! My first tank was a 26 gallon bowfront that was given to me by my brother in law. The tank was already up and running stocked with some softies, a couple clown fish, a baby yellow tang, and a cleaner shrimp. It was a simple system with no sump, just a hang on skimmer and carbon filter. It had power compact lights, a heater, and a single power head but no other equipment. This sparked my interest and I've been hooked ever since. Tank #2 is still up and running. It is a 55 gallon similar set up with no sump. It only has a hang on back skimmer and carbon filter and 1 powerhead, very similar to my first tank. I bought this one used from BillyC here on UtahReefs. The same clowns and yellow tang are living in this one 6 years later. Im sure the tang will be happy to move into the new 90 gallon as soon as its ready, as he has grown a lot and definitely outgrown the 55. Tank #3 was a failed attempt. I bought a used 90 gallon. After setting up all the plumbing and while waiting for the tank to cycle, it sprung a leak. I tore everything down, removed all the caulk and re-caulked the entire tank. Tested it for leaks and determined it was fixed. I then changed my mind about the upgrade and sold the whole setup. Tank #4 is the tank this thread is about. It is my renewed effort to upgade my setup. This tank is a 90 gallon MarineLand with a corner overflow that I purchased from Live Rock and Reef. The stand I had custom built by Driftwood aquariums. It has an extra tall canopy to give more room for maintenance. The sump is a 36 gallon ruby model by Trigger Systems. After the issues with leaks I had with the used tank I decided I would rather buy new and not deal with the risks even if it meant spending quite a bit more. After all, I don't think any of us got into this hobby because it's cheap... I'll post pictures of my progress and add to the saga soon! |
Replies:
Posted By: Krazie4Acans
Date Posted: July 20 2017 at 10:32am
|
Great start. Glad to be along for the ride. ------------- My ocean. 90g (yup, won it!), 40g, 28g, & 10g Systems PADI Advanced Open Water http://utahreefs.com/forum/forum_posts.asp?TID=63568&title=krazies-nano-paradise" rel="nofollow - Tank Thread: |
Posted By: Reefer4Ever
Date Posted: July 20 2017 at 11:29am
|
All buckled in for the ride. Let's do this. ------------- 90 gal reef w/refugium 24 gal softie tank 11 gal nano anemone tank 5 gal fresh water |
Posted By: speyside712
Date Posted: July 21 2017 at 6:09pm
|
Alright time to get this thing started! The tank is cycling right now, so I figured its a good time to go over what I've done so far and catch the thread up to be real-time. This tank has been in the works for a long time. My house needed a lot of preparation before it was ready for a tank. Since I was upgrading tanks and wanted to keep my existing fish, I needed to have both tanks up and running at the same time. Step 1 was to move the old tank out of the way. It was surprisingly easy to move compared to most tanks. I doesn't have a sump, and has a relatively shallow sand bed so after draining the water and removing the rock is wasn't all that heavy. It only took two of us to lift it. I was able to drain the water into buckets and a 25 gallon rubbermaid tub, put the rocks and fish into the rubbermaid, move the tank about 20 feet to its new location, and then move the water, rocks, and fish back into the tank. I was a little worried as I wasn't able to catch either of the yellow tail damsels. And when I removed the last rock I realized they weren't anywhere in the tank! But then they showed up in the tank just fine after it was moved. They must have hitched a ride inside one of the rocks. Sneaky little guys... The move only took maybe a hour or less, so I wasn't real concerned about adding a heater or bubbler to the rubbermaid tub. I had a number of house projects I wanted to complete that the old tank had been preventing. With it out of the way and before a new one went it, I could knock those out. I painted the entire living and dining room. Ripped out all the carpet, put down self leveling cement, and laid hard wood flooring. Changed the outlet where the new tank will sit to be a GFI. There is a small coat closet directly behind where the new tank sits, so I decided that would be like my mini fish room. I ripped out the existing single shelf, patched the holes and repainted the walls. The I built 4 new shelves, stained them, and installed them in the closet. These are the shelves being stained. http://s29.photobucket.com/user/speyside712/media/20170402_210759_zpspf3azzuj.jpg.html" rel="nofollow"> 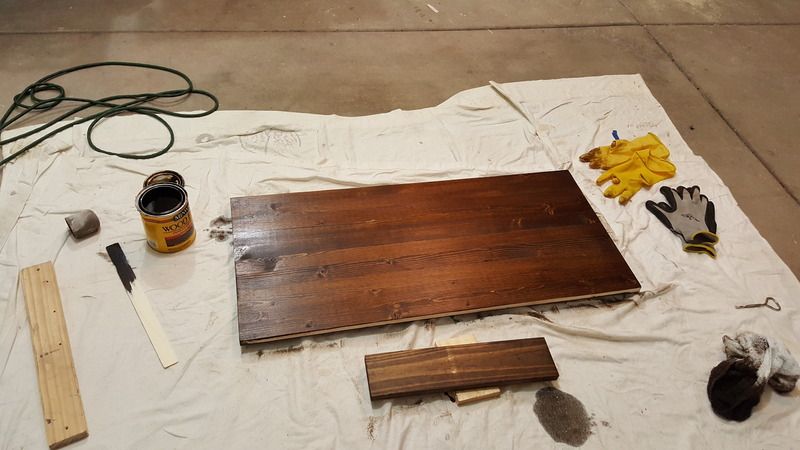 I cut two holes in the wall between the closet and the tank. I installed outlet boxes that let wires run right through to the other side. I was planning to use 1 hole for electrical and the other for plumbing. http://s29.photobucket.com/user/speyside712/media/20170325_201103_zps0xyktywk.jpg.html" rel="nofollow"> 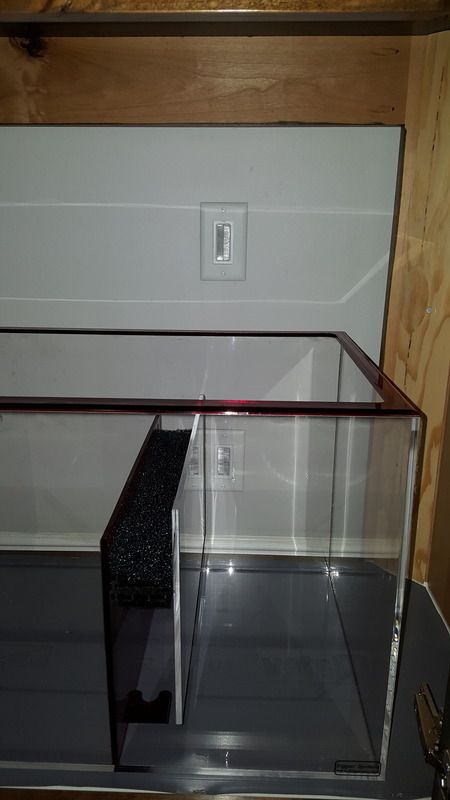 Next I had to get electrical to this closet. I ran new romex cable from the master bedroom that shares the closets right wall. I installed 1 outlet from this breaker. I ran another set of romex to an additional outlet on the left side of the closet, from the living room breaker. Now I had a space to store ballasts for my lights, auto-top off container, 2-part dosing containers, all the controllers, and various other supplies. Not to mention outlets from two separate breakers switches to allow for enough power without tripping a breaker. Now that I had the wall, floor, and fish closet prepped I was ready to buy a tank. After browsing a number of fish stores (and being devastated when I realized Bird World had closed!) I decided to order a stand through aquatic dreams. I asked for a dark walnut stand and canopy with a canopy 4 inches taller than standard. To my surprise they actually quoted me $200 less for a custom build than if I bought one they had in stock! :) After about 2 weeks they gave me a call and said the new stand was ready for me to come pick it up. I would recommend buying through them for anyone looking for a custom stand. The price was very reasonable and the work by DriftWood Aquariums is beautiful. I could not have asked for a better looking stand. My old stand was super flimsy and might collapse if you bumped into it by accident. This one is super sturdy and really high quality. I ordered a 36 gallon ruby model sump by trigger systems from BulkReefSupply.com. I shopped around for a while and it seemed like a good option for me. Its a little more expensive than buying a 35 gallon tank at petco and building the baffles yourself, but for the convenience factor and built in probe and filter sock holders, it was worth it. http://s29.photobucket.com/user/speyside712/media/20170325_201056_zpsv4ospcob.jpg.html" rel="nofollow"> 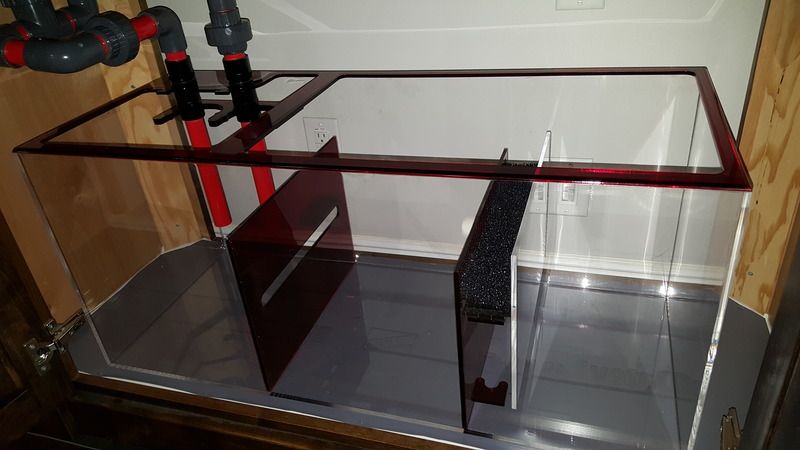 I shopped around trying to find a tank that had an overflow with 3 holes pre-drilled. After going to every fish store in northern utah, I gave up looking for one. I was hoping to use a herbie overflow and have the third hole to bring the return up inside the tank, but without drilling the tank myself or building the overflow from scratch it seemed I would never find a 3-holed tank. I'm sure I could have drilled it myself, but the stock overflows aren't quite big enough to allow for 3 bulkheads. So rather than custom building it myself, I decided to go with a standard 2 hole'd tank. I ordered a 90 gallon MarineLand tank from Live Rock'N Reef. They don't usually sell tanks so they had to order it, but they gave me a price $100 less than everywhere else I looked. Here is a shot of the setup: http://s29.photobucket.com/user/speyside712/media/20170318_132738_zpsgzovsqxb.jpg.html" rel="nofollow"> 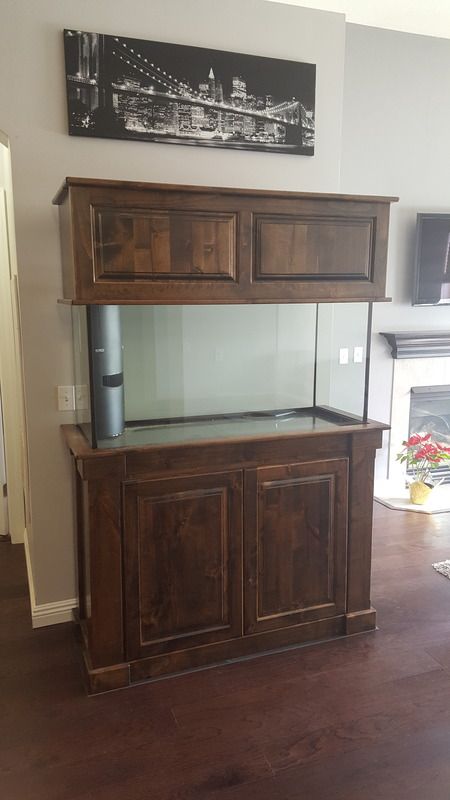 I'll add more tomorrow, pictures included!
|
Posted By: speyside712
Date Posted: July 22 2017 at 12:48am
|
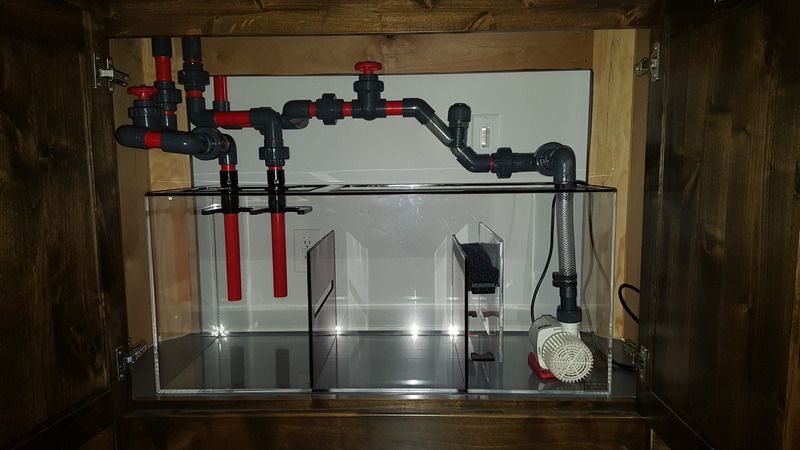
Next I had to cut holes in the stand for the overflows. Because the tank only has 2 holes drilled I decided to go with a herbie overflow and bring the return line up over the back. Next I cut a piece of thin rubber (from a roll of sound proofing material I had laying around) to size to fit under the stand. I wanted some protection between the wood and the stand since my wood scratches easily. I also cut a piece of pvc sheeting to place as a waterproof barrier under the sump. I stapled this to the bottom of the stand and set the sump on it. Originally I was thinking I wanted a waterproof basin that could hold a couple inches of water in the case of a leak, but this proved to hard to set up as my stand has angled corners inside. In the end I just went with a flat waterproof sheet to make and drips and spills easier to clean up. One thing I will say that I don't love about the sump is that it does not have a rim around the bottom like a normal tank. The acrylic sits directly on the stand. This makes it really important that the surface be absolutely clean and free of dust when you put it in place. I found multiple times I thought it was clean but there was a single grain of sand pushing against the acrylic that I had to remove. I brought everything into the house, carried it up the stairs with the help of my brother in law (I live in a second floor condo), and set everything up. Now I was ready to plumb the system. I ordered red PVC from BulkReefSupply and mapped out all the fittings, unions, gate valves, etc. Of course I had to re-order multiple times as it seems impossible to map these things out perfectly on the first try... I added as many unions as I could so that I could easily take the system apart and clean every piece. I placed a gate valve on the primary overflow and one on the return line. I also added a check valve on the return line. Here are some pictures of the final result. http://s29.photobucket.com/user/speyside712/media/20170325_201034_zpsa8rphnqp.jpg.html" rel="nofollow"> 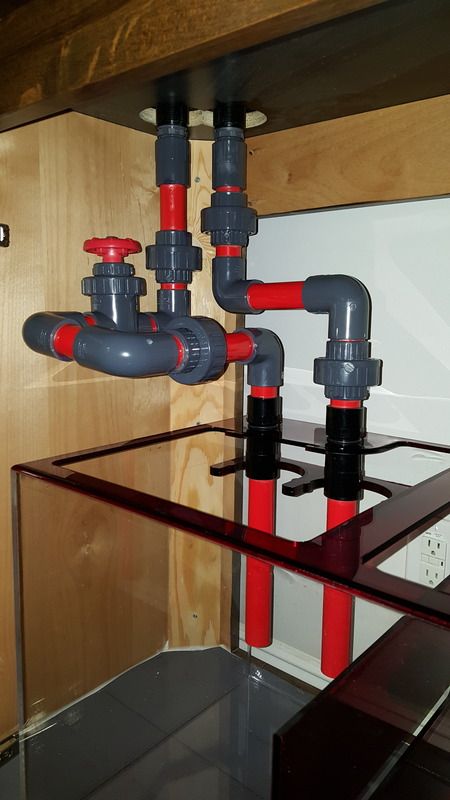 http://s29.photobucket.com/user/speyside712/media/20170401_144754_zpsykcduic0.jpg.html" rel="nofollow"> 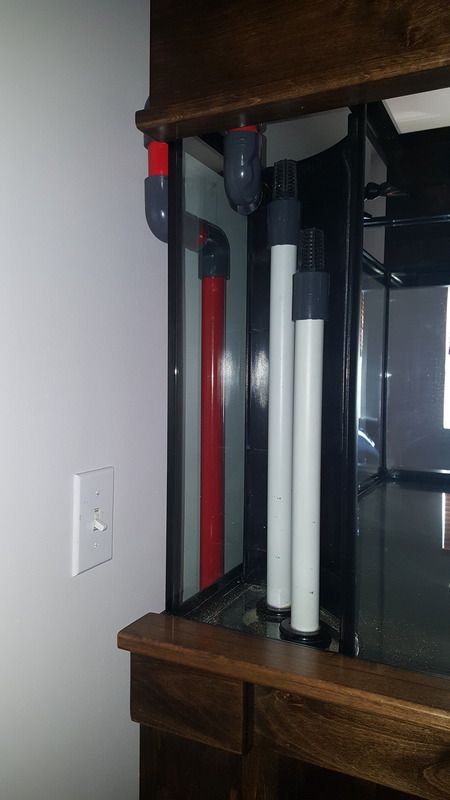 http://s29.photobucket.com/user/speyside712/media/20170401_144800_zpsivluosbv.jpg.html" rel="nofollow"> 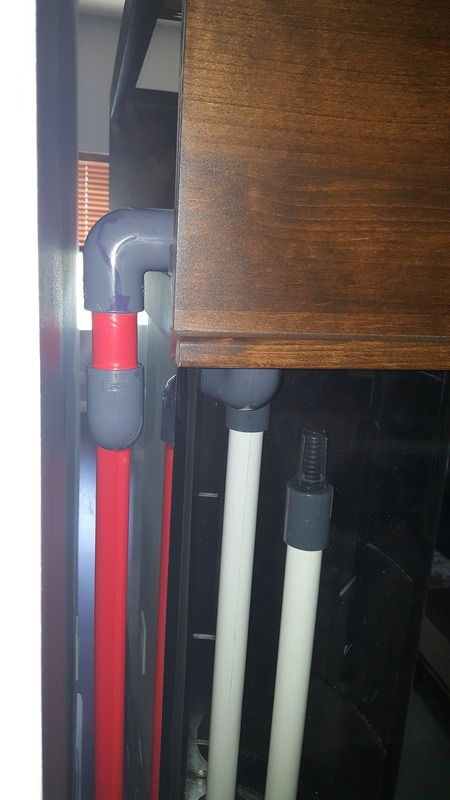 http://s29.photobucket.com/user/speyside712/media/20170401_144810_zpsk1hjrk3t.jpg.html" rel="nofollow"> 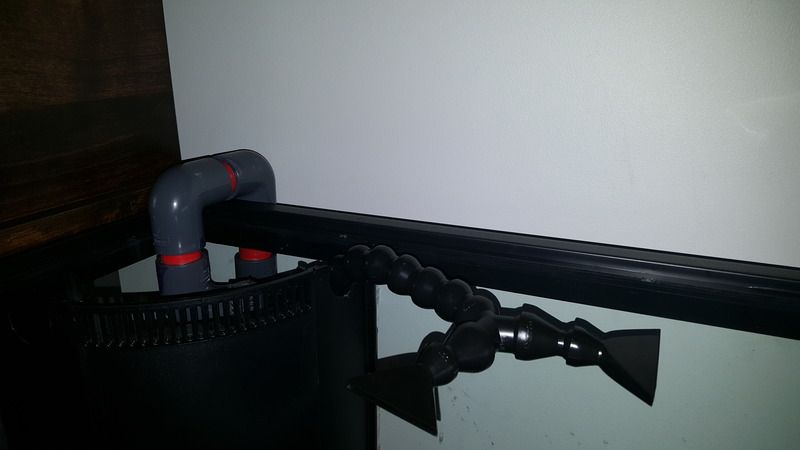 http://s29.photobucket.com/user/speyside712/media/20170401_144817_zpsmqnn8y0f.jpg.html" rel="nofollow"> 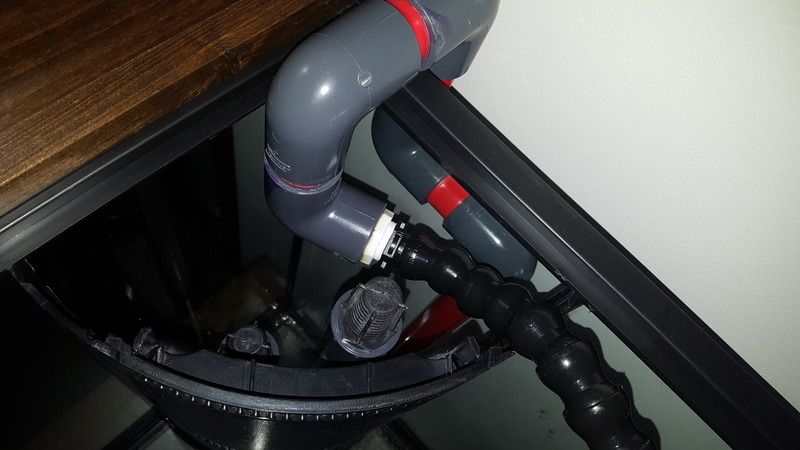 http://s29.photobucket.com/user/speyside712/media/20170401_145929_zpsvvct1i93.jpg.html" rel="nofollow">
 |
Posted By: speyside712
Date Posted: July 22 2017 at 1:00am
|
As you can see in the photos, I used a piece of flexible tubing to to attach the return line to the return pump. I had heard this would cut down on vibration and noise from the return pump. My previous build had an external iwaki return pump that was insanely loud, so I was hoping to not have to deal with that sound this time by going with an internal pump and using the flexible tubing. In hindsight I should have painted the back of the tank black to hide wires and plumbing. But since I didn't do that I decided all of my wiring and plumbing needed to be hidden behind the overflow. I routed the return line up right behind the overflow and have it coming over the back of the tank and into the overflow. From there the loc-line extends out into the display. I am really pleased with how the return line turned out. I had just enough room in the overflow to have the 2 standpipes and the return fit without bumping into each other. For the return pump I went with the Reef Octopus Varios 6. It has more than enough GPH and can easily handle the 5 or so feet of head pressure on my system. It also comes with a controller that allows for 5 speeds. It has a hookup for the included float switch to shut the pump off should it run out of water. And its apex ready. I am considering an apex controller so this was important to me. I have liked the pump a lot so far, its dead quiet and the controller works great and is easy to use. http://s29.photobucket.com/user/speyside712/media/7-22-2017%201-07-03%20AM_zpssdpssula.jpg.html" rel="nofollow">
 |
Posted By: speyside712
Date Posted: July 22 2017 at 1:21am
|
I have a few regrets so far and have made a couple mistakes, but nothing major yet. As I mentioned above I wish i would have painted the back of the tank black. I also made a mistake on the return pump. Although I have a check valve for power outages, that is really more of a backup plan for me. As i've heard check valves often fail. My main safety precaution on the return line was going to be a hole drilled in the return line just below the water line. I made a mistake where I chose to put this hole. I drilled the hole in the return line about a foot before it exits the loc-line, while its in the overflow compartment. My thinking was "the water level is a little lower in here, so I can drill the hole here above the water line and that will work as an immediate siphon break when the power shuts off." That didn't go quite as planned. It turns out that hole is below the loc-line. So what happens when I pull that plug on the return line is the check valve stops flow immediately (as expected) but the water continues to drain backwards through the last foot of the return line, from the display into the overflow compartment through the small hole. The water drains until the siphon breaks when the loc-line starts sucking air. So basically the tank will drain to whatever point the loc line return line is in the tank, albeit very slowly through the tiny hole (which is exactly what i wanted to avoid). I have not implemented a solution to this yet, as my loc lines are currently just under the surface and not a problem for the sump when you turn the power off. I think the solution is to drill another hole in the loc line itself, just under the water line in the actual display tank this time. That should solve the display tank draining issue. I may try and patch the first hole i drilled in the return line, as it is not helping anything at the moment, if i can figure out a good way to patch it. Any suggestions here would be great! The picture below shows where the current hole is drilled, so you can better understand the issue i'm dealing with. http://s29.photobucket.com/user/speyside712/media/7-22-2017%201-21-36%20AM_zpsvh80qznr.jpg.html" rel="nofollow"> 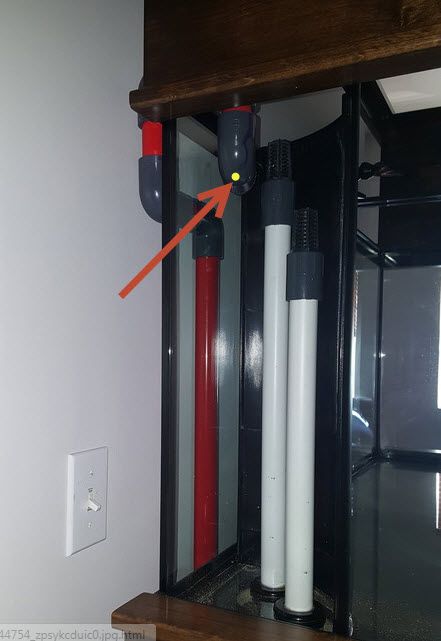 My other regret is not ordering enough red pvc pipe, and being unwilling to wait for another shipment to arrive. As you can see the standpipes in the overflow compartment don't match the rest of the system. This is just me being too picky, but still, its been bugging me everytime I look at it! lol |
Posted By: Mark Peterson
Date Posted: July 22 2017 at 8:02am
|
I can see where there can be a number of improvements, but I hesitate to say anything because most times it seems people make these threads after they are built. What they really want is a big pat on the back, not a critique. Sooo, Looks great.  I'm sure you'll figure it out. I'm sure you'll figure it out.Aloha, Mark  ------------- Reefkeeping Tips, & quick, easy setup tricks: www.utahreefs.com/forum/forum_posts.asp?TID=9244 Pay it forward - become a paid WMAS member
|
Posted By: speyside712
Date Posted: July 22 2017 at 8:43am
Go ahead Mark, let me have it! My goal here is to build a reef with as many redundancies as possible so as to not flood my house or kill the inhabitants. I'd love to hear your recommendations, even if they involve tearing it down and starting over 
|
Posted By: Mark Peterson
Date Posted: July 22 2017 at 2:12pm
|
Okay, here is what I see. Please take it for what it's worth, my 2 cents. Those round holes in the stand will make it very difficult to work on the bulkheads. There will come a time when you will wish you had cut one large hole so that a wrench can be positioned to loosen and tighten the bulkheads. It will save hours upon hours of painstaking labor spent trying to loosen and tighten a bulkhead. Assuming that this is a plastic frame glass tank, the hole can be cut very large because the tank sit's only on the plastic frame, not on that board. FYI, on some setups I have been able to enlarge these holes without removing the tank. "[stapled]...a piece of pvc sheeting...as a waterproof barrier under the sump." I do not believe this will hold water. Water will flow over the bottom, right out the back. It will also soak down into the wood via the staples. The basin you spoke of is very simple to do, using common outdoor pond liner stapled about 3"-4" high and folded/bunched in the corners around the vertical supporting structure. I would place a 4" board across the back to support the pond liner. An inexpensive moisture alarm is a nice addition, telling you when there is water, before it gets too deep. "I added as many unions as I could so that I could easily take the system apart and clean every piece." Each union is a point of failure where a small leak will eventually occur. Each time the union is unscrewed and put back together the point of failure is renewed. A missed tiny bit of crud on an O-Ring can cause a leak. Instead, use as few screw-able joints as possible. If a problem develops, just cut the pipe, fix the problem and put it back together with a glued coupling or all new piping. "I also added a check valve on the return line." I have seen check valves on many systems done by others. The check valve will eventually fail because of crud buildup on the seal, causing it to leak or not even close at all. Also, the resistance of that valve makes the pump have to push harder. All the 90 degree turns in the return piping will also add resistance, adding to the need for the pump to push harder. Just because BRS sells them and many other hobbyists use them, doesn't mean they are a good idea. Remove the check valve. There is a better way. "I wish i would have painted the back of the tank black." Easy options here. Drape some black material or black plastic sheeting from the tanks top plastic frame, secured with tape or slide in a large piece of rigid plastic sheet outside next to the back glass. "I made a mistake where I chose to [drill] this [siphon break] hole." Easily fixed. Dab some thickened PVC cement at the hole. To thicken PVC cement, just leave a glob sitting out in the air for a minute. "...the tank will drain to whatever point the loc line return line is in the tank." That is correct. The answer to this will make you go "Doh!" The answer also eliminates the need for a check valve or a siphon break hole. The solution does one more thing, something that is extremely important for animal health. The simple solution is to position the end of the Lock-line at the same level as the drain teeth. The siphon will break when it sucks air. I see a "Y" has been installed on the lock-line. One of the ends sucking air will break the siphon even though the other end may be deeper in the water. This high end can be goose-necked so that it shoots a jet of water along the surface at a slightly down angle to keep water from splashing. The larger water disturbance caused by the jet and the surface water it pulls along with it, is a very good vehicle for gas exchange. Of course, the running water level in the sump must still be low enough to contain the draining water during power off status. "My other regret is not ordering enough red pvc pipe... its been bugging me everytime I look at it! lol" This may surprise you but you can use paint, preferably epoxy to paint the pipe. I have also used ABS cement to paint white pipe black. The advantage I see in black pipe is that it becomes virtually invisible. Miscellaneous suggestions: - I would use larger diameter pipe for the main drain. Water will back up around a 1" pipe, whereas it will flow faster around a 1.5" or even 2" drain. I often use a PVC bushing to increase the size of the pipe at the top of the stand pipe. Think of the circumference of a pipe as a spillway. The spillway of a 1.5" pipe is about twice as wide as a 1" pipe. - I would remove the fan attachments at the ends of the Lock-line. Our animals want strong fast flow. Fans spread out, diffuse and slow the flow. They are generally counter-effective to what we want going on. Actually, because of the limited flow, the single overflow will allow, I'd remove the "Y". It also spreads out and slows the flow. One jet of water will make the best beneficial flow. - The drain tubes leading into the filter bags are too long. A shorter tube makes it easier to remove and replace bags. Hope this helps. Aloha, Mark ------------- Reefkeeping Tips, & quick, easy setup tricks: www.utahreefs.com/forum/forum_posts.asp?TID=9244 Pay it forward - become a paid WMAS member
|
Posted By: speyside712
Date Posted: July 22 2017 at 5:02pm
|
Appreciate the 2 cents mark! Many good points there. Here are my thoughts regarding a few of them. Regarding drilling 2 holes in the stand for overflows, I used a 3=inch hole saw for each hole. That size gave me enough room to use one of those wrenches we all use for tightening bulkheads. I believe they are normally built for sprinklers but just happen to fit perfectly. The drilled holes overlap a little, which gives me a little extra room to maneuver in there. You are right that its a plastic rimmed tank where all the weight is on the edges, so drilling giant holes doesn't hurt anything. But luckily my holes are big enough to work the wrench up there. When you suggest using a wider drain line, do you mean for the backup, or the main overflow? Or both? I find i have to use the gate value to tone the overflow down a bit to keep full siphon going. I have my return line fully open and the pump set to 3 out of 5 on its controller speed setting. Maybe if I cranked it up to 5 and removed the loc-line fittings I would need a 1.5 inch drain, but it seems 1-inch is already plenty large enough isn't it? Ill add more later, gotta run to a family birthday party! Happy reefing. |
Posted By: speyside712
Date Posted: July 22 2017 at 11:18pm
|
As for the pvc sheeting. The stuff I used is definitely waterproof, it is what you would use to line a shower or bathtub prior to installing it. I believe it's official name is "PVC Shower Pan Liner." I considered the idea of building a bit of a waterproof basin around the sump. But when I started building this it was proving to look rather ugly and I didn't think I could make the sides sturdy enough to hold more than an inch of water without adding some wood on the front and back of the base of the stand, something I could staple the liner to. I ultimately decided to just do a flat piece to act as a waterproof floor below the sump.
|
Posted By: speyside712
Date Posted: July 22 2017 at 11:35pm
|
Mark it's always good to have another person's view point when putting one of these together. Especially someone as experienced in the hobby as yourself. I love your idea of hanging something black right behind the tank. That is a brilliant idea! I never thought of that. I am also going to use your suggestion of using thickened PVC cement to plug the poorly placed siphon break I drilled. Regarding a few of the other ideas though, I will have to respectfully disagree. Not because your idea wouldn't work, but because I considered that option and planned to take my build in a different direction. You suggested removing the loc-line fan adapters, and the Y bend to increase flow. I agree with you that flow is very important, however, my return line is only providing a tiny amount of the overall flow in the tank. I have two Jabeo wavemaker pumps and 1 mp-10. The jabeo's are crazy strong. Strong enough to splash water out of the tank if I turn the wave makers all the way up. I haven't gotten to that part of the build yet so you didn't have any way of knowing that, so its understandable you suggested getting increased flow through my return line. You also mentioned going without a siphon break and check valve, and instead keeping the return line very high in the water. I also agree that surface agitation is quite important to keeping the water well oxygenated. I do plan to keep the return line very high in the water so they agitate the surface. I also point my powerheads slightly to add even more surface movement. The siphon break and the check valve are both backups in case the return line were to get bumped down lower than usual. The check valve I bought is the type that easily unscrews to be cleaned, it also came with 2 extra gaskets and plungers in case the first one starts to wear out and disintegrate (as rubber always does in salt water). I agree that a check valve should never be the main means of preventing your sump from overflowing, however I decided to add it as an additional backup plan. With the intention of cleaning it often. As for the added head pressure it causes on the return pump - I mitigated this problem by buying a pump that is quite a bit more powerful than I need, so it should be able to handle the added head pressure without any problems. I'm only running it at half power at the moment. Your suggestion not to use unions is very interesting. I have heard they are very reliable and don't often leak if attached correctly. I have a bag of extra gaskets. If these are prone to leaking after time like you say, it sounds like I should be inspecting them regularly and replacing any damaged or disintegrating gaskets. I'm disappointed to hear the leak often. They make plumbing a system SO much easier, as you don't have to glue elbow joints in the perfect direction. Being able to turn the union to line up your plumbing is an important feature to me. I have seen quite a few other fellow reefers use these. Have many of you run into problems with them leaking like Mark has? Your final suggestion of shortening the overflow pipes that feed the filter bags sounds like a good idea too. I think i'll do that. I have noticed it is quite difficult to change the filter socks with them being that long (especially when my skimmer is right in front of them blocking my path). My thinking in cutting them that long in the first place was "If these are too long I can always cut them in the future, but if they are too short i'm SOL." That and I wanted to get them low enough in the water that I didn't have any splashing adding to the ever growing salt creep. |
Posted By: Mark Peterson
Date Posted: July 23 2017 at 7:27am
|
Sounds great. I agree with your reasoning. I meant just the main drain standpipe, but never mind. I was mistakenly thinking of a different drain system. As you said, it works fine like that. The water level in the overflow chamber is controlled by the gate valve so the drain opening is completely submerged and siphons a lot of water very fast. In this situation it's the overflow teeth that restrict draining capacity. Higher flow at the return pump backs up more water in the display, creating the need for more sump capacity during power OFF. It's a balancing act, as I'm confident you recognize. Regarding the drain tubes into the filter bags, another thing that can help is to leave them without glue, just friction fit in to the bulkhead. Perhaps you already thought of that.  Overall it's a great build, attractive and looks to be very functional and easy maintenance. It will be fun to see it with livestock.Aloha, Mark ------------- Reefkeeping Tips, & quick, easy setup tricks: www.utahreefs.com/forum/forum_posts.asp?TID=9244 Pay it forward - become a paid WMAS member
|
Posted By: speyside712
Date Posted: July 23 2017 at 11:59am
|
Yep that's exactly right Mark. The primary overflow standpipe is submerged and running a full siphon, while the backup just works to keep the water level stable and has a slow trickle of water running through it. I've found its pretty quiet, but not completely silent like I had heard a herbie should be. Lots of bubbles are being created when the water runs over the teeth at the top of the overflow. These bubbles then get sucked down the main standpipe, making some noise as they go. The water only has to fall about an inch and a half when it goes into the overflow compartment, so i'm surprised this is happening. Has anyone found a solution to deal with this? Putting a screen or filter floss up against the teeth would probably fix this, but also slow the flow going into the overflow... hmmm. Mark you mentioned "just friction fit the tubes into the bulkheads." I used fittings that adapt friction to screw on. I glued the pipe to the fitting on the friction side. So am I able to unscrew the pipe and remove these if needed. I did a similar thing on the main bulkheads attached to the tank. The standpipe in the overflow compartment is glued to the bulkhead and a 2 inch pipe coming out of the bottom of the bulk head is glued too. The 2-inch pipe is then glued to a fitting that adapts the pipe to accept screw in fittings. I used a dremel to trim the outside of the fitting down a little bit so that the bulkhead nut fits over the fitting. The result is that I have a fully glued bulkhead like I wanted, but I am still able to remove it. To remove it I unscrew the first union which allows the above pipe to spin. Then I unscrew the small section of pipe that has union on 1 side and screw in fitting on the other side. Once this piece is removed the bulkhead nut can be unscrewed and slide all the way down over the attached pipe and fitting. What method do other reefers use for this? I feel like there should be an easier way. Does anyone use the screw in type bulkheads instead?
|
Posted By: speyside712
Date Posted: July 23 2017 at 3:47pm
|
Got a few more updates to add today - I bought about 100 pounds of reefsaver dry rock from Bird World (before it closed down recently), and 20 pounds of pukani rock from BulkReefSupply. I built the aquascape directly on the glass to ensure it was stable should any critters try to rearrange the sand below. I glued each rock together using superglue gel and the quick drying spray. That spray is amazing, it saves days of time waiting for glue to dry. The final result wasn't exactly what I had in mind, but i'm sticking with it. I tried to make it relatively open with a sort of stairway affect leaving different levels for various corals. After finishing the rock work I poured in about 50 pounds of sand or so. I am thinking of adding more, as its only 1 to 2 inches thick at the moment. Here is the end result: http://s29.photobucket.com/user/speyside712/media/20170519_005911_zpsn3stzfpl.jpg.html" rel="nofollow"> 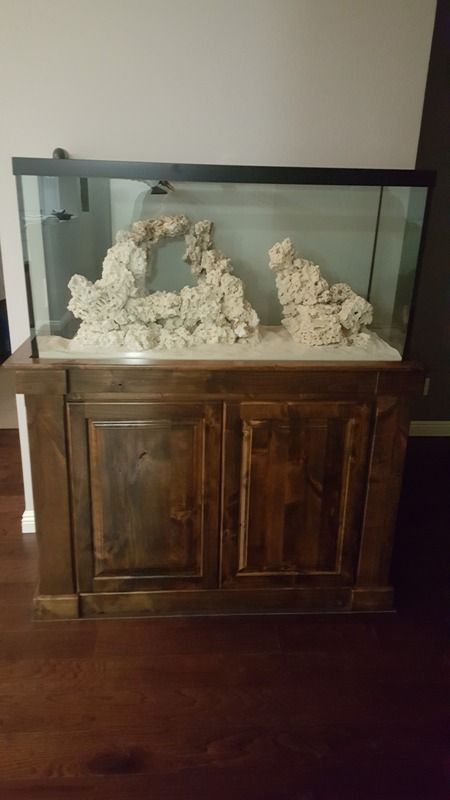 The sand I used was from a previously built thank that never made it past the cycling period and never had any life in it. The sand has been stored wet for about 2 years in 5 gallon buckets outside on my patio in the sun. I wasn't sure what to expect with the sand after being stored that long, through snow and sun for 2 years. I was pleasantly surprised to find the sand perfectly clean with no mold or smell. I imagine some anaerobic bacteria had made the sand their home, but I don't believe there is anything in there that could nuke the tank. And even if there was some problem bacteria living in there, giving it a full 3 months to cycle and I assume the "good" bacteria will have taken over by then.
|
Posted By: phys
Date Posted: July 23 2017 at 3:58pm
| Looks good! In my experience, try to make sure you have enough horizontal space to put your corals on. If you build your rock too vertical, you'll lose the coral growing potential and have a lot of shadowing. I cant tell how you have it from the front shot so just throwin this out there lol. |
Posted By: Mark Peterson
Date Posted: July 23 2017 at 8:20pm
|
I like the aquascaping. I agree with Paul about horizontal places for coral. It looks to me like there are gradual inclines from several sides making plenty of spots to place coral. I also see smaller rock making what I call foothills in front of mountains. I enjoy that look. The sand, having had very minimal life and then killed in the sun and freeze for two years, in my opinion is just like brand new sand. I would not wait 3 months. There would be no need. As you know I don't cycle a reef aquarium. The tank can be set up with coral and fish in a week, while preserving the nice aquascaping and actually helping the display colonize with a lot of life within a month or two. If this sounds interesting, I'd be happy to discuss the method. Noisy? One advantage to bushing up to a larger diameter pipe at the drains top section is that the suction power at the opening is reduced so that bubbles don't get sucked in as easily. See the pic below of how I do the drain pipe on a suction style drain. Note that in this setup there was no emergency drain. For several reasons it wasn't needed. Also note the simple rigid plastic screen used for a strainer, which keeps objects from going down the drain  Regarding the standpipes in the overflow and where to set the water level in that area, I do it a little different and it's completely silent. Besides being a larger diameter, I cut the main drain standpipe a little lower which allows the waterfall of bubbles to rise before they near the suction. The emergency drain standpipe is about 1/2" below the top of the tank and rarely gets any water coming down it. Using the gate valve I set the drop of the waterfall from the teeth into the overflow to about 1/2" to 1". Over time, a build-up of organic growth at the teeth waterfall seems to help quiet the waterfall. "What method do other reefers use for [bulkheads]? I feel like there should be an easier way. Does anyone use the screw in type bulkheads instead?" I learned a fail proof method when I worked for a professional reef aquarium maintenance company. This method has been used on hundreds of large tanks here in Utah. The bulkheads are thread-slip. This means there are threads on the upper and no threads on the lower end. A male adapter with rigid PVC standpipe screws in to the bulkhead, inside the overflow. Underneath, Spa-flex PVC pipe or rigid PVC pipe is glued into the lower part of the bulkhead. For a suction drain setup, the gate valve is glued in the pipe about 12" below the bulkhead. If the bulkhead ever needs to be removed, the pipe is cut right at the bulkhead. The cut end is glued up into the new bulkhead. Though I am the King of Cheap, I found it better not to try and reuse bulkheads. Bulkheads are the most critical part of the entire setup and usually the most trouble to fix. If forced they can crack and/or leak. In comparison, a new bulkhead is cheap. Aloha, Mark ------------- Reefkeeping Tips, & quick, easy setup tricks: www.utahreefs.com/forum/forum_posts.asp?TID=9244 Pay it forward - become a paid WMAS member
|
Posted By: Mark Peterson
Date Posted: July 24 2017 at 7:06am
|
Spaflex PVC pipe has a curl to it because it's still warm out of the oven when it's rolled up for storage and delivery. Rotating the pipe into position takes advantage of that curl and where the curl is not enough I use a 45 fitting to make the bend to where it needs to go. A 45 degree angle is less obstructive to flow than a 90. Spaflex is semi flexible so it naturally absorbs vibration. A short length of vinyl tubing at the pump is unnecessary. The curl can be removed by leaving the pipe on the car dashboard on a sunny day with the windows rolled up or by warming in a kitchen oven. I prefer Spaflex over rigid PVC because when working in the sump area I might bump into the plumbing. The last thing I want is to force, by leverage up the pipe, the bulkhead to push off axis and start leaking. Or worse, to break the bulkhead. Even worse is to crack the glass at the bulkhead.  I have been there, done that, so I try to be careful. I have also over-tightened bulkhead nuts and threaded fittings which breaks/cracks the (relatively) soft vinyl bulkhead, rendering it useless. Hope this helps. Aloha, Mark ------------- Reefkeeping Tips, & quick, easy setup tricks: www.utahreefs.com/forum/forum_posts.asp?TID=9244 Pay it forward - become a paid WMAS member
|
Posted By: speyside712
Date Posted: July 24 2017 at 2:37pm
|
Mark, I did use some spaflex pvc in the system. The piece coming from the return pump to the hard plumbed lines is spaflex pvc, just 8 inches or so. I used that to reduce the vibration and noise that you can get when you have a fully hard plumbed system. I considered using more spaflex, and possibly even the entire return line. I eventually decided against it mainly because I like the look of a fully hard plumbed system a bit better. I agree with you that avoiding 90 degree angles and opting for multiple 45's instead would increase flow. I actually used this method on a previous build that had an external return pump. I opted to use 90's this time instead because I had read on a few other forums that the loss of flow was not significant, and using 90's makes measuring, cutting, and gluing the plumbing a little less complicated. It would be interesting to test how much each 90 degree fitting reduces flow. I might have to do some googling for someones experiment on that. There are some flow monitoring devices that can be connected to controllers. I bet someone has already done the work for us out there. I have ten 90 degree fittings, two 45's, a check valve, and about 5 feet of vertical lift from the sump to the top of the tank. I'm sure that adds a decent amount of head pressure. Here is the graph of my return pumps output: http://s29.photobucket.com/user/speyside712/media/7-24-2017%202-33-05%20PM_zps83vaavgh.jpg.html" rel="nofollow"> 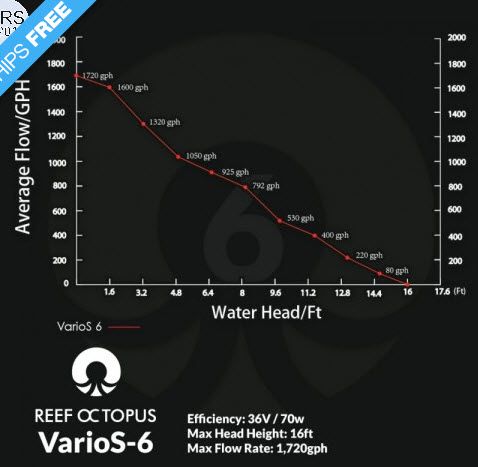 I don't have a flow meter, and with my tank already being full its a bit hard to see how much its pumping at a time. But using the old fashioned eye ball test it appears to be getting a pretty good amount of flow through into the tank. With a 90 gallon display and a 36 gallon sump, i'm guessing I have about 100 gallons of water total. The sump runs about half full due to the baffle placement, and the rock and sand displacement in the display I would guess is about 10 gallons of water. Leaving me with 80 in the display and 18 in the sump. There is also some water in the plumbing and in the reactors. So i'm guessing I've got right around 100 gallons. If that is correct, then this pump is capable of turning over all the water in the system about 10 times an hour. If the elbows and check valve are doubling the head pressure of the return line, then the pump would still be turning the water over 5 times an hour. I think anything between 5 and 10 times an hour is acceptable right?
|
Posted By: Mark Peterson
Date Posted: July 25 2017 at 8:38am
|
Yes that is fine. The pump ought to be played with and adjusted to get the maximum flow without risking sump overflow. In the old days that turnover was often the only flow in the tank. These days we have the propeller driven in-tank pumps that revolutionized the hobby. I love em. They are much better and less trouble than the old Closed Loop systems. Maybe I went on to much about elbows and piping. In retrospect though, I need to say that the volume of a powerful pump can simply be turned up to push water past the obstacles, but the drain is different. Drain efficiency can be severely compromised by fittings and changes in direction. The resulting drag can create flow and noise issues. Gravity and the pressure gradient of a display that is 5 feet above the sump is all the power we have to make water flow down. To avoid some of the problem, the drain line should be the straightest shot possible. I may be able to add a pic to show this. Watch for it. Aloha, Mark ------------- Reefkeeping Tips, & quick, easy setup tricks: www.utahreefs.com/forum/forum_posts.asp?TID=9244 Pay it forward - become a paid WMAS member
|
Posted By: speyside712
Date Posted: July 27 2017 at 12:31am
|
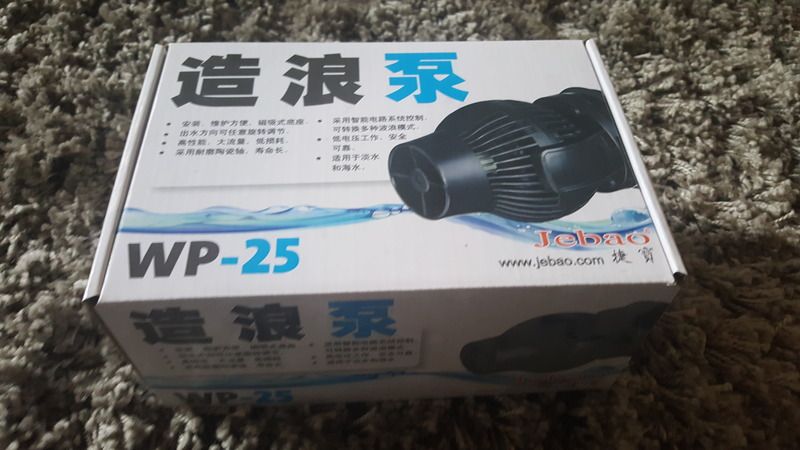
I hadn't even thought about the flow being restricted in the overflow lines! That's a good point. I was completely focused on flow in the return line and never even considered flow being restricted in the overflows. I'll keep that in mind for a future build. As we all know, everyone wants to upgrade to a bigger tank someday, even if this one is brand new haha. Anyway, I have a few more updates to add today. I've been continuing to work on the tank in all my free hours after work. I received some exciting deliveries. Pictures are below! New Radion Pro Gen 4's http://s29.photobucket.com/user/speyside712/media/1f9c57d5-d53f-4cc3-94f2-5dab7648dce0_zpsdwlj2csi.jpg.html" rel="nofollow"> 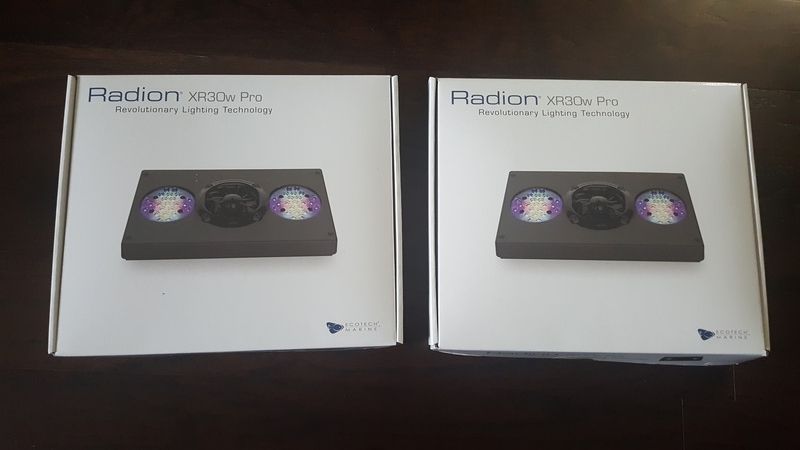 The mounting kits for the radions. http://s29.photobucket.com/user/speyside712/media/131a7f11-f368-44d8-baae-ab2a588f7c33_zpsimawlrec.jpg.html" rel="nofollow"> 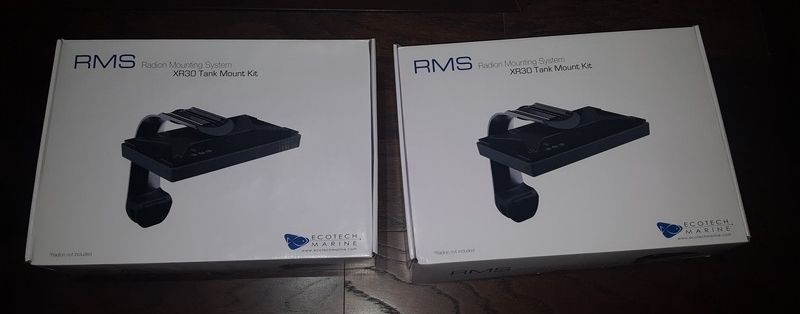 New ReefLink for the radions and an MP10 http://s29.photobucket.com/user/speyside712/media/f220ad70-cb2f-421e-b300-366fa16e5157_zpsmwdprman.jpg.html" rel="nofollow"> 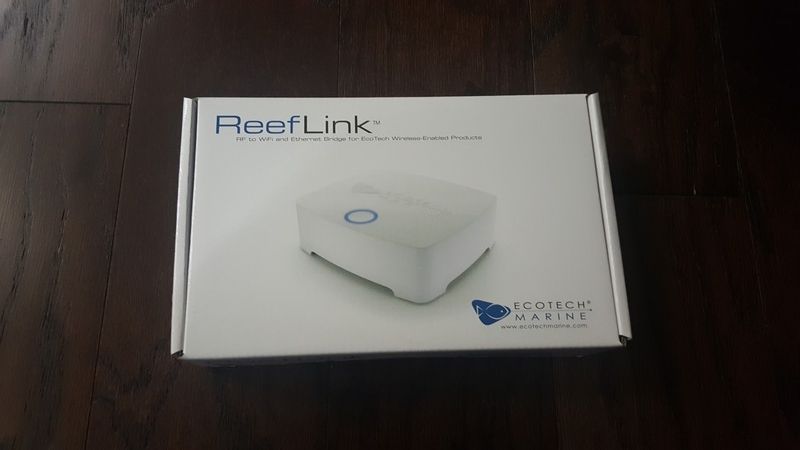 8 more filter socks (I've got 11 now, hoping this is enough so that I can make it a month or more without washing any). http://s29.photobucket.com/user/speyside712/media/0367a37a-df96-4e6a-adef-282b10f3a9b9_zpsxok2dl4r.jpg.html" rel="nofollow">  A new reactor to run GFO and Carbon http://s29.photobucket.com/user/speyside712/media/20170723_143909_zpsviuimphe.jpg.html" rel="nofollow"> 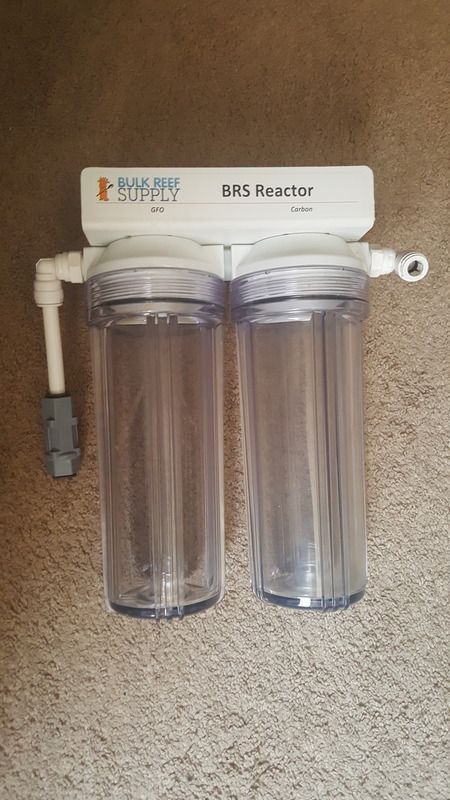 2 of these wave makers (the tank will have 2 of these and 1 MP10) http://s29.photobucket.com/user/speyside712/media/20170719_182217_zps7lbwml4w.jpg.html" rel="nofollow">
 |
Posted By: speyside712
Date Posted: July 27 2017 at 12:36am
|
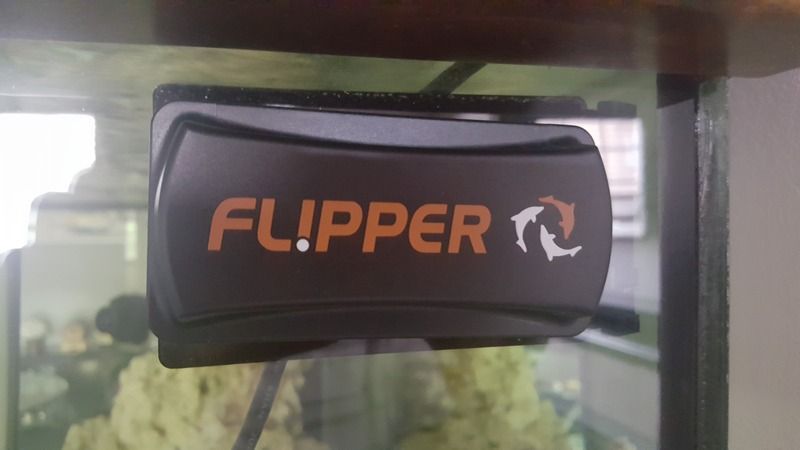
Oh I can't forget the flipper! I read some really good reviews about this mag-float type glass cleaner. So far i've liked it a lot, its really easy to flip. 1 side has a scrubber pad and the other has a metal blade. I was worried I would scratch the glass when I flipped it, but the blade isn't sharp so it doesn't appear to scratch anything. I'm hopeful it will remove coraline algae from the front and side glass, fingers crossed! http://s29.photobucket.com/user/speyside712/media/20170719_182204_zpsfqddyk9r.jpg.html" rel="nofollow">
 |
Posted By: theresawhite
Date Posted: July 27 2017 at 7:21am
| It's like Christmas in July for you :-) |
Posted By: Krazie4Acans
Date Posted: July 27 2017 at 7:35am
Love the new toys. I personally would ditch the reeflink and get an Apex with a wxm to control the lights and WP10 but that's just me.  ------------- My ocean. 90g (yup, won it!), 40g, 28g, & 10g Systems PADI Advanced Open Water http://utahreefs.com/forum/forum_posts.asp?TID=63568&title=krazies-nano-paradise" rel="nofollow - Tank Thread: |
Posted By: Hogie
Date Posted: July 27 2017 at 8:16am
| I love my flipper! Best glass cleaner ever. |
Posted By: speyside712
Date Posted: July 27 2017 at 9:29am
|
I was originally planning on getting a new Apex with a wxm module to control the lights, but after reading all the reviews on BulkReefSupply I changed my mind. Maybe you can talk me back into it? These reviews of the new apex are pretty bad. About half of them on BulkReefSupply are similar to this. Do you have the new one or one of the previous versions like the classic? I have heard great things about the apex junior. Maybe I should go with one of the older models. I was just having a really hard time getting the apex and extra modules for 800-1500 bucks (when you include a bunch of modules), when the ReefLink was only $100 and had great reviews. http://s29.photobucket.com/user/speyside712/media/7-27-2017%209-23-05%20AM_zpszigavuj3.jpg.html" rel="nofollow">  http://s29.photobucket.com/user/speyside712/media/7-27-2017%209-23-59%20AM_zpswshxop1o.jpg.html" rel="nofollow">
 |
Posted By: Krazie4Acans
Date Posted: July 27 2017 at 9:55am
|
The new model had a rough launch for sure. I have two classics and a new (2016) model. They have all been solid for me but I didn't buy the 2016 until a year after it was released. There are quite a few people that have issues with the probes but I have had my apex long enough to know that when I get a new probe I put it in my sump and let it soak for a week before I try to work with them or calibrate them. There are lots of posts about this and ways to "fix" the calibration issues but they are on the Neptune forum. I'd be happy to help you with the setup if you decide to go the Apex route. You could choose to go with a classic gold model instead of the new one if you were worried about it but the probe calibration methods are the same. ------------- My ocean. 90g (yup, won it!), 40g, 28g, & 10g Systems PADI Advanced Open Water http://utahreefs.com/forum/forum_posts.asp?TID=63568&title=krazies-nano-paradise" rel="nofollow - Tank Thread: |
Posted By: Mark Peterson
Date Posted: July 27 2017 at 10:07am
|
I have been using the Flipper for many years. As you run it along you can feel it scrapping the algae. Minute spots of Coralline Algae that have just landed on the glass and started to grow are scrapped off before they are even visible. BTW, Two 45's used to make a turn is more drag than just one 90. Have you ever felt inside of a PVC joint? Where the pipe goes in it makes a ledge all the way around. That ledge creates drag. As you can probably tell, I have put a lot of thought into the mechanics of flow. As I said above, the drain line is where it really matters because we don't have the luxury of turning a knob or pushing a button to increase the flow. I agree, colored pipe and fittings looks really cool, but under the display tank is where things need to be completely functional. The drain line I see in this pic has at least 18 (eighteen) of those ledges, makes four 90 degree turns and flow is futher impeded by a foot of horizontal travel.
I recommend removing that "Rube Goldberg" contraption and replacing it with this: 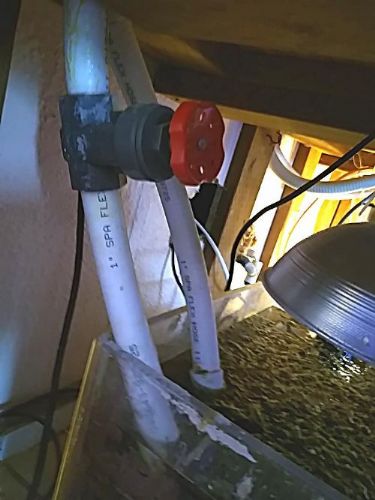 This drain line comes straight out of the bulkhead almost straight in to the Refugium. Only two ledges and zero turns. The emergency drain beside it does the same thing. Something else. Remember in a previous post where I said it would be unnecessary to wait the 3 months you said you would wait before stocking this tank? And you were so pleased to show off a pic of filter bags that were going to need washing. In the pic above, is there a filter bag? That's because this tank which has been running more than 10 years has no filter bags, in fact no messy mechanical filtration whatsoever. Would you like to see a pic of that tank and to learn how it's done? Aloha, Mark ------------- Reefkeeping Tips, & quick, easy setup tricks: www.utahreefs.com/forum/forum_posts.asp?TID=9244 Pay it forward - become a paid WMAS member
|
 speyside712 wrote:
Posted By: speyside712
Date Posted: July 27 2017 at 10:08am
|
in reply to Krazie4Acans - Oh ok thats good to know. I think I would like to upgrade here pretty soon. I have a number of other pieces of equipment that are all apex ready that I would like to be able to control.
I like the idea of the controller being more of a backup to add additional redundancy to the system. I'm a programmer by day, so I have a ton of If/Else-Statements in my head that I would like to be able to use on the tank... "If auto-top off runs for more than 30 seconds, kill the power to it","If the temperature goes above 80.0, kill the heaters", "if it goes above 81, kill the lights and turn on the fans and send a warning text to my phone" I assume you can do this type of thing with the controller right? I also love the idea of the leak detectors, and being able to monitor things without using the old fashioned test kits. What types of probes do they make other than the standard r that come with it? ORP, temp, salinity, PH Are there probes out there for ammonia, nitrite, nitrate or any of the other things we commonly test for?
|
Posted By: speyside712
Date Posted: July 27 2017 at 10:26am
|
Mark - I would agree with you that your overflows are much less restricted and probably have more flow through the same diameter pipe. My question then becomes, is my flow really being restricted enough to consider re-designing it, or would opening up my gate valve a little farther than you open yours make ours equal? I'm not sure if you are running a full siphon on the example above or if you are using more of a durso type design, that would also affect the speed the water is moving (is it being sucked in like a vacuum, or falling gracefully ).At the moment I have the gate valve restricted a decent amount, in order to tune the system to stay perfectly level in the overflow box. If I wanted more flow, I could turn my return pump up from setting 3 (where it currently is) to 4 or 5 and open the gate valve a bit more. I guess what I'm thinking here is that I'm already not running my return pump at full power on purpose, and making this type of change would require me to run it at a higher setting. I do this to mainly to reduce the total amount of water in the system. As i'm sure you know, running a pump at a higher speed, even with more flow coming through the overflow, still requires more water in the system because more of it ends up in the display tank waiting to go through the overflow box teeth. As you mentioned before, the limiting factor becomes the teeth at the top of the overflow box. They only allow so much through at a time. The teeth in my overflow box currently rise about an inch above the water's surface, so I have some room to go before its technically full. However I really like having less water in the system for the unlikely scenario that a team of turbo snails decides to clog all the overflows at the same time. When this happens its nice to have as much extra room in the display as possible (especially considering I have an auto-top off that will kick on for 15 seconds or so in this scenario) so that your return pump will run out of water (and shut off in my setup due to a float switch) before the display overflows. The wave makers in the display also make this situation a little scary, as the water is rocking back and worth in the tank, so it doesn't have to be completely full to spill out. I guess what I'm saying is that I am ok with running my return pump at half power and having my overflow pull water more slowly out of the tank if it means I can keep less water in the system.
|
Posted By: speyside712
Date Posted: July 27 2017 at 10:30am
|
Oh I almost forgot. Mark - To answer your filter sock question. What exactly is the goal of running a system without using filter socks or any type of mechanical filtration? All I am trying to use them for is to polish the water and make it more visibly appealing to the human eye. I would agree that they are not necessary for coral or fish to thrive, but I feel like the water looks cleaner and clearer to me when using them. They can become nitrate factories and restrict flow if not cleaned/replaced regularly. But if they are properly maintained I think they provide a nice visual enhancement to the reef. I would love to hear about your setup that doesn't use them though. Do you have a link to another post? My sump also has some filter floss type blocks that sit in the bubble trap. I find they work more for reducing bubbles rather than catching detritus, but they do a little of both. Speaking of bubble traps, does any one else find they actually make more bubbles then they trap.... I've had this issue with my last two tank setups. I assume the problem is that I am not keeping the water level high enough in the return pump section of the sump, however I want that section as low as possible, to reduce the water volume in the tank and prevent a display overflow in the event of clogged overflows. When water flows over the first section of the bubble trap it splashes into the final section, creating bubbles. A few of those get sucked up the return pump and into the display.
|
Posted By: Mark Peterson
Date Posted: July 29 2017 at 2:30pm
|
The pic I posted above is of an aquarium using a Herbie style drain. Durso Style drains do not use a gate valve nor do they typically use an emergency drain. Below I will address other points of our discussion. My answer: To reduce unnecessary weight on the delicate bulkhead  , to save space, to maximize flow and to reduce risk of failure. The added weight of pipe and backed up water and a few bumps, the bulkhead is bound to leak. I have worked on more tanks than I can count and I've seen a lot of crazy cluttered plumbing. These Rube Goldberg Contraptions reduced efficiency and sometimes were an accident just waiting to happen. , to save space, to maximize flow and to reduce risk of failure. The added weight of pipe and backed up water and a few bumps, the bulkhead is bound to leak. I have worked on more tanks than I can count and I've seen a lot of crazy cluttered plumbing. These Rube Goldberg Contraptions reduced efficiency and sometimes were an accident just waiting to happen.  Both the Herbie and the Durso style drains suck water like a vacuum. The Durso device, operating at the water surface, also sucks air fairly violently. The little air port at the top of a Durso leads into a chamber of air which acts like a muffler to quiet the sound of the water-air mixture as it gets sucked down the pipe. The Herbie is quiet because it sucks only water. Both drain styles suck water at the same speed. My http://utahreefs.com/forum/forum_posts.asp?TID=79264" rel="nofollow - Modified Durso style drain is less bulky and is typically quieter than the standard Durso. The use of mechanical filtration to catch fine particles is a method peculiar to tanks operated without a Refugium. Also, very mature tanks without a Refugium don't usually have too much trouble with fine particles, making mechanical filtration unnecessary. This means the hobbyist is freed of the arduous task of replacing and washing filter socks. Then the accompanying pollution problem caused by dirty socks disappears. One of the major drawbacks with filter socks is that they trap the sorts of living organisms which are essential for higher levels of operation of the entire ecosystem. At night a plethora of life comes out and floats in the system. Filter socks trap that life. A tank without filter socks actually matures much faster. My final thought on this topic; the uneaten food that gets trapped in a filter sock /sponge filter is food which helps the animals living in the Refugium to thrive, or, if there is no Refugium, that food cannot be returned to the micro invertebrate animals in the display. Noisy waterfalls over baffles cause bubbles. Skimmers cause bubbles. Think of the sump as a river. Removing waterfalls, slowing the speed of swift flowing rapids and expanding the water channel are some of the ways to allow bubbles time to rise and pop. Alternatively, a forest of Algae or a clump of loose stringy plastic media create surfaces where the bubbles adhere, combine, rise and pop. A very inexpensive yet very effective, no bubbles, sump-Refugium is discussed here: http://utahreefs.com/forum/forum_posts.asp?TID=36396" rel="nofollow - http://utahreefs.com/forum/forum_posts.asp?TID=36396 Hope this helps a little. Aloha, Mark ------------- Reefkeeping Tips, & quick, easy setup tricks: www.utahreefs.com/forum/forum_posts.asp?TID=9244 Pay it forward - become a paid WMAS member
|
Posted By: Mark Peterson
Date Posted: July 30 2017 at 12:30am
|
I promised to post a pic of the tank that uses the straight shot drain described and pictured above. Look here and drool: http://utahreefs.com/forum/forum_posts.asp?TID=82936" rel="nofollow - Humongous Coral discovered in Local Reef ------------- Reefkeeping Tips, & quick, easy setup tricks: www.utahreefs.com/forum/forum_posts.asp?TID=9244 Pay it forward - become a paid WMAS member
|
Posted By: speyside712
Date Posted: July 30 2017 at 1:22am
|
LOL Mark I get a kick out of your responses. "Convoluted piping" and "Rube Goldberg contraption" I agree that my overflow doesn't follow the "keep it simple stupid" concept But I promise there is a method to my madness.The main drainline that includes 2 unions, a gate valve, multiple 90 degree elbows, and a variety of fittings was all planned out. Literally every thing I have read and every reefer I have talked to (with the exception of you lol) has told me "put as many unions as you can possibly fit on your plumbing, you will be thankful you did in the future when you need to take it apart or reconfigure to add equipment!" I visited a number of reef aquariums to get an idea of what I wanted to do, and asked for a lot of advice from each of them. I figured out what I liked and what I didn't. I visited Teknik777's tank when he lived in centerville, BillyC's tanks both in provo and again after he moved to centerville, and FatMan's 3 tanks in south weber. All three of these guys are pretty experienced in the hobby and have beautiful tanks, I'm sure I drove them crazy with questions, but they were all happy to help. Mark I even checked out one of your tanks believe it or not. Although, it was set up at Mountain Wesdt ReefFest at the Red Lion. Its been a few years I think it was 2013 or 2014? I pestered your with a few questions too back then! The shape I created was specifically designed to fit a gate valve between two unions so that I could remove the whole section if needed. The top section above the first union was designed to allow me to use slip-to-slip bulkheads but still be able to remove them without cutting anything. I hate cutting PVC and will avoid it at all costs. It leads to gluing right under your tank to fix the cut sections, dripping messy PVC glue all over the place, and just an overall hassle. And If the fittings are already closer than an inch to eachother, you are SOL and get to start over. Basically its a task I would really like to avoid. I needed more room in order to fit unions and a gate valve on my main overflow. The length I had available was simply not long enough to fit the unions and gate valve if I went directly from the tank to the sump. My elbows didn't fit, the pipe was passing by the sump entry point once I had all my fittings in place. The second issue I ran into when planning this out was that the second overflow line was too close to the first one. This prevented me from doing the same shape for both overflows. Basically the pipes ended up bumping into each other. I had to divert the main line away from the backup to give me enough room. After trying a number of configurations, I ended up with this one. It kept the plumbing out of the way so that I could fit my skimmer in the first sump compartment. The gate valve was easily accessible even with the skimmer in place; and it met all of my requirements regarding the multiple unions, easy removal of the entire thing, and easy removal of the bulkhead. As for the weight issue. I will admit that is not something I have ever thought of. This is the first time I've ever even considered weight on the bulkhead being a problem. I'm glad you brought that up to expand my horizons a bit. However, now that I'm thinking about it, I don't think there is much weight on the bulkhead at all. The overflow is attached to the sump. When I attached this thing in the first place I was being held up completely by the sump. If I unscrew the top union, the pipe doesn't move at all (although It was not full of water in this test, its not a significant amount of water in 2 feet or so of pipe). I think the weight of the overflow could rest on either the bulkhead or the sump without breaking or causing a leak, however it is attached to both, splitting the weight between the two and keeping it perfectly upright. I would hope this would be enough to prevent the bulkhead from bending and eventually leaking. The pipe is pretty far out of the way so I don't foresee bumping it when trying to work in the sump. It is up high and in the back corner. I'll just have to be careful when changing filter socks or cleaning the skimmer not to bump it. I do bump the return line all the time, however, this one is free floating and not attached to anything so that one isn't a problem. I used the industrial strength velcro to attach the return line to the back of the tank in a few places. This way I didn't have to drill into my fancy new stand. I stuck the velcro right to the glass on the back of the tank, behind the overflow compartment so you can't see it from the front. It does a really good job of holding the return line in place. You couldn't get this stuff off without using both hands, its pretty tough. Back to the overflow though - I do agree with you that my creation is not a simple design and has more spots where it could fail (all the unions...) but there was a lot of thought put into it. And I think those unions will help more than they will hurt. I might not have mentioned, but I'm planning on moving in about 2 years or so. So I tried to build the tank in a way that it can be taken down and taken apart without too much effort. It will still be an entire day of work to move it, but at least now its possible without cutting pipe and re-gluing it.
|
Posted By: speyside712
Date Posted: July 30 2017 at 1:54am
|
Mark - to address your filter sock comments. I agree with you that having a filter sock on the overflow will remove some of the "good stuff." However, I am ok with that. I have the expectation that this tank will have less of the "good stuff" than most tanks we see in the hobby due to the way I'm starting this tank. I started this reef with all dry rock. I didn't use any live rock, live sand, or anything from another tank. I have been very careful not to use any tools or equipment on this tank that have been in contact with my other tank. Basically, this thing is sterile at the moment, with the exception of the bacteria I'm working on growing during the cycling period. I had a pest problem in my last tank: the small brown flatworms that kill your LPS and sit on your softies stealing all their light, tons of tiny white pest starfish, a variety of pest snails including box snails, limpets, and pyramid snails) and I'm trying very hard to avoid that this time around. In my previous tank I did not have a quarantine system set up for fish, nor did I fresh water dip or treat corals prior to putting them in my tank. I am lucky I have never killed any fish when I brought home new ones that could have been infected with a variety of problems, however, I wasn't so lucky in the coral pest department when buying frags. The new tank I'm setting up will have no "good stuff" that usually comes from buying live rock. I plan to dip all my corals and quarantine things extensively prior to letting them enter my new tank. So if all goes to plan, the only life in my tank should be that which I introduce on purpose. Now I know we all try to keep pests out of our tank, but that doesn't always happen. I'm sure its possible bad or good creatures other than the one i'm paying for could possible tag along for the ride and enter the tank. However, I do think my startup method will drastically reduce the level of life in my tank, especially in the early months. I may consider removing the filter socks once the tank is more established and the refugium is up and fully functioning. But at the moment they have been very useful. I chose not to rinse my sand before putting it in. The filter socks cleaned up that mess in a matter of hours. Your method of an as-natural-as-can-be reef is pretty cool and does support lots of tank life, I just don't think its my cup of tea. Back to the bubble trap question I had. You mention "avoid waterfalls in the sump." I agree 100% that this waterfall is creating the bubbles. However, the only way to avoid a waterfall to your return pump is to put more water in the system..... I want to have the least water possible..... Hmmm, there has got to be a way to get the best of both worlds here. I am going to try putting some more filter floss in the bubble trap to lessen the distance the water has to fall before it hits something. My goal here being to have the return pump only barely submerged by maybe an inch of water above the intake (which forces a waterfall), but still no bubbles. I think I can make this work... |
Posted By: Mark Peterson
Date Posted: July 30 2017 at 7:32pm
|
Awesome. You've put a lot of good analytical reasoning into this and have come up with solid, logical solutions. I'm extremely impressed. As I was reading that last paragraph, I was thinking of the solution... and then you came up with it.  Raising the pump, by setting it on a pedestal, hanging it or raising the intake with an elbow facing up, is something I have done with many tanks. Raising the pump, by setting it on a pedestal, hanging it or raising the intake with an elbow facing up, is something I have done with many tanks.You've thought this out very well. I'll bet this tank will be a lot of fun for you as it grows and matures. Sounds like it has already been very satisfying and fun. I can see that you are more patient than me, but the pests you mentioned are easy to deal with and to eliminate if wanted. Let me know if you want advice on getting rid of any pests that accidentally get past you. Aloha, Mark P.S. Thank you for finding humor in my responses. Are you familiar with the old cartoon of the OSHA Horse? Where you picked my brain, was that the MWRF where, for the Aquascaping Contest, I did the Avatar Tank? ------------- Reefkeeping Tips, & quick, easy setup tricks: www.utahreefs.com/forum/forum_posts.asp?TID=9244 Pay it forward - become a paid WMAS member
|
Posted By: speyside712
Date Posted: August 09 2017 at 12:43am
|
I wasn't familiar with that cartoon but I looked it up - describes my method here to a T! I have been to MWRF twice, once in fall 2011 and once in 2013 if my memory serves me right. I do remember there being an aquascaping contest when I talked to you, so that was probably it. Your tank had some hanging rocks like the floating mountains of pandora right? Anyway, for an update on the tank - I bought a new protein skimmer from another WMAS member, gave it a vinegar bath, and installed it. It is the Bubble Magus Curve 7. I already had an ASM G4, but the G4 doesnt fit in my sump very well and I had heard good things about the bubble magus. I like that it has the pump inside the cylinder so it takes up a lot less space and makes changing filter socks a bit easier. Its also easier to remove and clean it when needed. I can't speak to how much skimmate it produces, as I haven't used it yet. I'm letting the tank get as grimy as possible during the cycling phase before I turn on any equipment (other than the return pump and heaters of course). The tank is just cycling right now so I've been taking my time and setting up all the equipment. I still have quite a bit left to install. I ordered two test kits, one to monitor the cycling process and the other to monitor the tank post cycle. I'll have ammonia, nitrite, nitrate, ph, calcium, alkalinity, and phosphate covered. Those should arrive today or tomorrow I think. Gotta love amazon prime. The equipment I have yet to install includes: two brs dosing pumps The 2-part dosing containers A tunze osmilator ATO Brs dual reactor for gfo and carbon I also just bought a used apex classic from a WMAS member. I need to calibrate the probes, mount the controller and get my fusion account setup. It came with a ph, temperature, orp probe, as well as the leak detector module with 1 ALD probe and an energy bar 8. I have a long list of upgrades to buy for the apex but i plan to wait until everything else is hooked up and running before spending more. I have the controller for all three powerheads and the return pump that need mounting too. 2 of these wont reach my "fish closet" behind the tank due to really short cords.... not sure what to do about that. I'm wondering if i can find some sort of extension cable online for the jabeo pumps. Basically I have a decent amount of labor ahead of me that I would like to get finished here by the end of the month. The cycle started June 25th, so I imagine I have a good amount of bacteria in there now, but it doesn't hurt at all to wait little longer. Hoping to get all this equipment installed asap. Ill post some more pictures of the equipment as it goes in so you can see the progress. |
Posted By: speyside712
Date Posted: September 28 2017 at 4:44pm
|
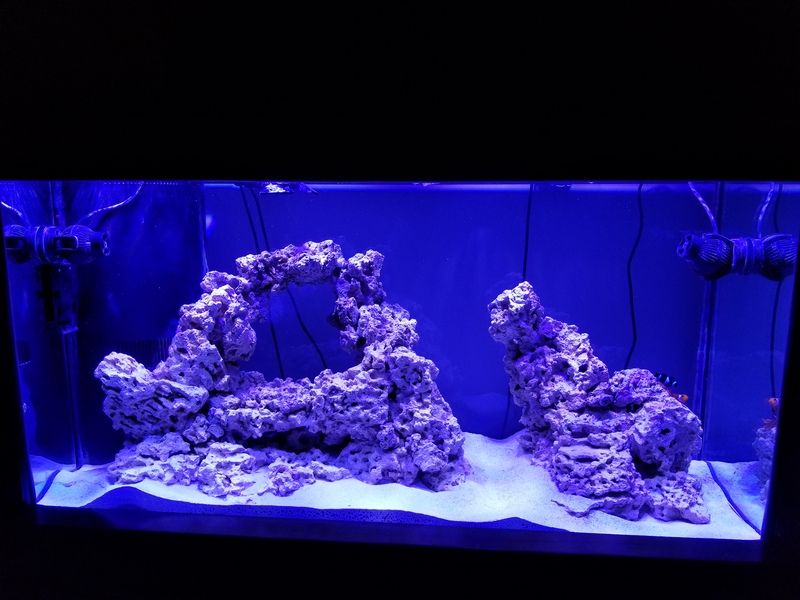
Hey everyone, after taking a few weeks off from the forums I am back with some more updates on my 90 Gallon build. The tank has been progressing slowly. I have been adding equipment slowly (clearly I bought too much stuff!). I mounted a BRS dual reactor in the cabinet and loaded it up with GFO and Carbon. I bought a larger pump to run the reactor instead of the MaxiJet it came with. I tried out the MaxiJet and it wasn't strong enough, even with the ball valve completely open the flow was really weak. I couldnt get the GFO to tumble at all. There was no visible movement in the GFO at all and I feared it would become a solid rock after a week of that. The pump has to lift the water about 2.5 feet, so that must have just been too much head pressure for the original pump. The new one didn't exactly fit the 1/2 bendable pvc that BRS supplied with the reactor. To fix this I snipped 2 inches of rubber tubing off the end of a water change syphon kit. This fit perfectly over both the pumps output and the 1/2 pvc and doesnt leak (it sits in the sump anyway, so a tiny leak wouldn't matter anyway). The result worked out pretty well, the GFO is tumbling ever so slightly to prevent it from turning to stone. At this point I was ready to build a mounting board. I bought some wood at lowes and was able to put it together pretty quick. I built the board to sit on a shelf in the closet behind the tank. It has 4 legs, with the back 2 being longer than the front 2 so it sits slanted toward the front. All the wires get concealed under the mounting board and on top of the shelf. I mounted the following so far: 2 energy bar 8's 2 jabeo powerhead controllers 1 Tunze Osmilator controller 1 Reef Octopus return pump controller 1 Apex Classic 1 Apex Display module 1 Apex WXM module 1 Apex ALD Leak Detection module 1 Apex PM2 Salinity module Here is a picture of the mounting board. http://s29.photobucket.com/user/speyside712/media/20170923_134405_zpspf5mn6za.jpg.html" rel="nofollow"> 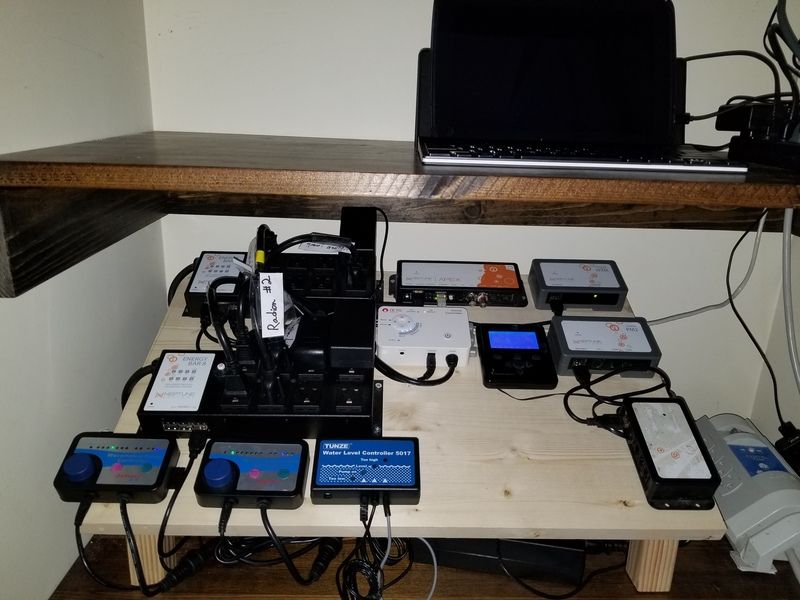 I was planning to use a spare Google Nexus 10 tablet as a full time tank controlling device and leave it on the shelf in the closet, but i'm finding that the Apex Fusion app doesn't work at all on android, the home screen doesn't have any buttons and is basically a frozen screenshot. Due to this I have to navigate to the website and log in every time in order to control anything. I might as well just use my phone to do this so i'm not standing in front of the closet for long periods of time. Its much easier to control from the couch on my phone. I have yet to calibrate my probes and get those working, but I do have my fusion account set up and the energy bar 8's configured. Since I dont have the probes working yet I have a few items set to "always on." That is the next item on my list to fix. Now to the exciting stuff - As the whole project is being done to upgrade an existing tank, I have 5 fish waiting to move into their new home. Now that the tank has been cycling for nearly 4 months it should be good and ready to start adding life slowly. The fish waiting to be moved in are 1 orange/white ocellaris clown, 2 yellowtail blue damsels, 1 flame angel, and 1 yellow tang. I have had all 5 fish for about 6 years, so they are at least that old (not sure how old they were when I bought them). I am trying to put the fish in in the perfect order to reduce aggression. Three days ago I added a new bubble tip anemone, a new juvenile black and white ocellaris clown, and my larger female orange and white ocellaris clown. All went well and they are now both hosting in the same anemone together. Here is a shot of them together. http://s29.photobucket.com/user/speyside712/media/20170928_162851_018_zpsdolitdtj.jpg.html" rel="nofollow"> 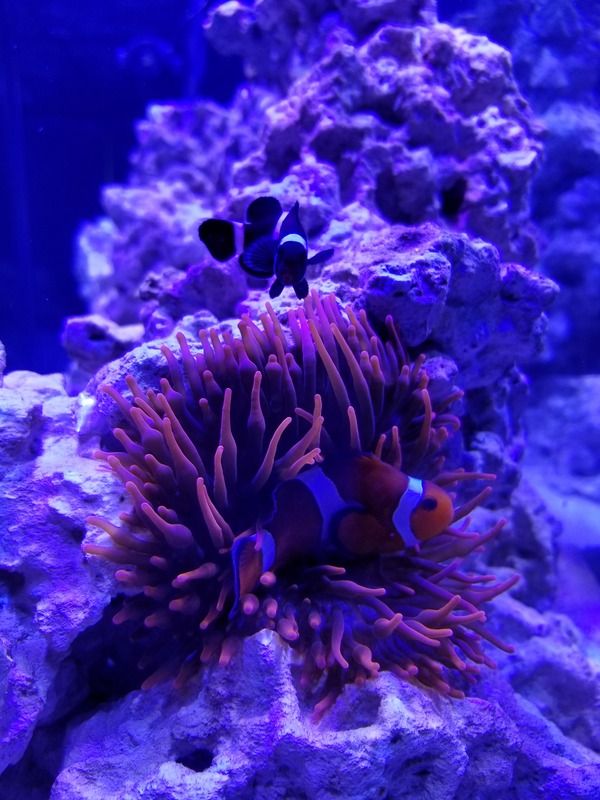 I had one algae bloom of diatoms near the end of the cycle, when I first started turning on the lights. It all died off after 3 days. I don't have any coralline growth yet because I started with all dry rock and dry sand, so I'll need to introduce some into the tank at some point. I've been monitoring my ammonia, nitrite, and nitrate levels and so far so good. My bio-load is extremely small at the moment, so I don't forsee having any problems with that as long as I keep going slow and only add fish every few weeks. Here is a FTS taken today. http://s29.photobucket.com/user/speyside712/media/20170928_162832_zpsxf3veagy.jpg.html" rel="nofollow">
 |
Posted By: MadReefer
Date Posted: September 28 2017 at 9:11pm
| Nice work. |
Posted By: Corey Price
Date Posted: September 29 2017 at 11:15pm
|
Looking good! I would have to disagree with Mark. Your plumbing is not bad. In the future, you could consider what I did on my 120g tank a LONG time ago: drill the back of the tank at the overflow, about half way up. It allowed me to put three pipes in the tank. I'll see if I can find a picture. I would have suggested it a while ago but it's only been in the last few weeks that I've really been back at this stuff. |
Posted By: speyside712
Date Posted: October 22 2017 at 10:47pm
|
Made some more progress on the tank this week. I installed 2 BRS dosing pumps inside the cabinet, ran the lines through the wall to my "fish closet" and mixed up my first batch of 2 part. I haven't actually dosed any yet, planning to measure my calcium and alk tomorrow to gauge how much I should dose. I bought a digital timer to run the pumps the right amount of time. Next I followed some of Mark's advice. I was regretting not painting the back of the tank black before installing it. Mark suggested hanging something black behind the tank to solve this. I ended up using a black garbage bag, the thick contractor type. I taped it to the back edge of the tank and taped the bottom corners in place. It was a little tricky to snake it in front of all the wires and plumbing, but it came out looking pretty good in the end. You can see a crease or two where the bag was folded, but I'm hoping the creases will go away with some time. I also added a little bit of life to the tank. Jeff down at The Fish Tank hooked me up with some chaeto for my refugium and a bottle of tigger pods. I got some pods in the mail from algaebarn.com too along with some live phyto plankton. Algaebarn seemed pretty expensive to me but they had a buy 1 get 1 free going for first time users so I ended up with 2 of everything. Since I didn't start with any live rock at all I'm having to specifically buy each of the "critters" I want in the tank. Luckily the chaeto I got from Jeff had some amphipods running around in it. I will probably buy some calerpa too in hopes of getting a little more bio diversity going. |
Posted By: speyside712
Date Posted: October 22 2017 at 11:25pm
|
I bought a couple zoa frags at The Fish Tank, making the first corals in this tank. My plan is to buy mostly frags and wait for the grow out. My anemone decided to make the wrong side of the tank his home, where neither he nor the clown fish can be seen from the front. I've been trying to encourage him to move to a more visible spot with some flow adjustments, I think I am finally making progress. I aimed a small power head right at him. Not enough to damage it, but just enough to piss it off so it would go looking for a new home. I think it worked because he was starting to move tonight as the tank lights were going off for the night. Fingers crossed he is front and center in the morning. |
Posted By: Dion Richins
Date Posted: October 26 2017 at 4:48pm
|
Just found this thread ;) Looking awesome!!!! ------------- http://www.customaquariumfurniture.com" rel="nofollow - Bad "censored" Cabinets Best quality in the valley! He is one sexy bald guy, even with out a finger!(MAC) |
Posted By: evan127
Date Posted: October 26 2017 at 4:52pm
| Very nice build! I love the aquascape! |
Posted By: speyside712
Date Posted: October 27 2017 at 11:23am
|
Hey thanks guys. I've done some more work the last couple nights, a bit more progress. I have another thread going in the General Discussion section about the trouble i'm having with my apex probes. But last night I got 4 of 5 probes working as intended. The 2 ph probes and 2 temperature probes are now working well. two are in the filter sock/skimmer section, and two are in the return pump section. I've got the temperature set to bounce between 77.7 and 77.8, it never seems to be more than .1 degree off, and the ph probes are currently fluctuating between 8.1 in the day time and 7.9 at night.
The PH had previously been a lot lower, but I think that was due to the cycle finishing. The 2-part i've started dosing daily has helped too. I'm dosing a small amount of 2-part daily until I can get my Calcium to 450 and my Alk to 9. I was at 400 and 7 when i checked 4 days ago. Once I get them up to this point I have a feeling I won't have to dose hardly anything since I have almost no coral at this point, and no stony corals. Once i start adding corals i'll keep checking my parameters and adjust the 2part as necessary. I was given a big piece of chaeto from a fellow reefer in Kaysville. I already had a little bit in my tank but was really after the amphipods and all the live that comes along with it. I inspected the 2 zoa frags I got from The Fish Tank last week, making sure I didnt get any pests I didn't want. After using no live rock to start it and all the hassle that comes with, I should probably be pretty careful what I put in there. The frags had a little dark red coraline algae and two tiny feather duster worms. The kind that everyone has in their tank that grow on everything. I don't particularly mind the worms so I left em on there. I'm still toying with the idea of throwing my "dry rock only, no pests" idea out the window and buying a piece or two of live rock to seed it with more life. I feel like i'm missing out on some of the good stuff. |
Posted By: shaggydoo
Date Posted: October 27 2017 at 11:37am
|
I would seed the rock with some LR from an established system. Maybe see if someone on here that has a relatively pest free (no aiptasia, bubble algae, etc.) system would be willing to seed some rock in a sump for you for a few months. Then you can get some of the beneficial critters without worrying much about unknown pests tagging along. ------------- 60g LPS Cube |
Posted By: speyside712
Date Posted: October 27 2017 at 11:47am
|
Ya that's kind of what i was thinking. I have an established tank with plenty of rock that i'm taking down, but its full of flat worms, tiny white starfish, and millions of pyramid snails. So i'm being careful to not transfer any of that to the new one. I may see how the tank is doing without seeding it for a few more months and then make my decision. Maybe i can pluck a few bristle worms out of my old tank for the new ones. I would like a few of those to keep the sand free of detritus. Some people hate those, but i've never found them to be a problem. |
Posted By: shaggydoo
Date Posted: October 27 2017 at 1:33pm
|
I've never had an issue with bristleworms either, and I've always had a ton. Currently, I have several very big ones that are not bashful about coming out every time I feed. I consider them a part of my CUC and they help me when I overfeed (which is often). I can harvest them easily with a trap I made out of a plastic bottle if I ever feel the need to remove any. Not a bad idea to give it some time, and if you don't see the feather dusters, various harmless worms, and/or sponges that we mostly like, you can always carefully seed at a later time. ------------- 60g LPS Cube |
Posted By: Hogie
Date Posted: October 27 2017 at 2:33pm
|
I HATE bristleworms!!! I'm tired of my fish getting stung by them, I'm tired of me getting stung by them, and I'm tired of there uncontrollable ability to show up everywhere! I'd put every last one of them in a bath of vinegar and watch them squirm if I could. Love and Peace |
Posted By: speyside712
Date Posted: October 27 2017 at 3:22pm
|
Lol this is what i mean by "i know some people hate them" HAHA We must have a different type of bristle worm. mine never seem to get longer than 2 inches, occasionally youll see a big one thats 3 inches long, but thats about the max. Mine dont hurt me, fish, coral. They really just eat anything that dies in the tank, or i've seen them dine on my tangs... well... excrement... to put it nicely. Either way, they seem useful to me. Further speeding up the nitrogen cycle and reducing waste. I have heard of big ones that eat coral though, maybe you ended up with the bad kind....
|
Posted By: backwards32
Date Posted: October 27 2017 at 8:46pm
|
I am glad you came by and got some macro algae. Looks like the tank is doing well. If you need a little bit of live sand come on over again ------------- Fish Food Direct Great Food for half the price 801-721-0671 call or text me anytime |
Posted By: speyside712
Date Posted: October 27 2017 at 9:21pm
|
Hey thanks! And thanks again for the algae, it was full of pods, I can see them running all over the sump now! Live sand might not be a bad idea. You've got a good looking build going. I'm jealous of how much room you have for the sump and all that extra water volume. I bet you have nearly double your display tanks size in total water volume with those 2 extra tanks plumbed into the system. |
Posted By: Mark Peterson
Date Posted: October 28 2017 at 12:32am
I once worked at a place where LR was transshipped in. It came direct from the ocean without going through a distributor. As it was placed in the "curing vats" (no light, huge skimmer) to "clean it up". I would sort through to find the most unique fist size or double fist sized pieces that had tons of sponge, algae and any other animals. The company didn't mind me buying the small pieces that couldn't be used or would have been considered rubble in a client aquarium. Sure, this LR had stuff on it that was dead and decomposing, but when placed in a mature aquarium the mature biofiltration handled the dead stuff while providing excellent water conditions for recovery of anything still alive. Every couple of months I would take a few pieces home and place them into my established reef. I cannot describe all the cool things that began to grow in my system from that uncured LR straight from the ocean. New things often emerged many months after introduction. Why do distributors "cure" LR? My take on it is that aquarium maintenance companies don't have the time to carefully watch the aquariums they maintain and most hobbyists don't have the experience. desire or time to deal with new creatures, or don't have experienced fishy friends like here in the WMAS to help them understand and deal with strange new creatures. Why this current trend among hobbyists to use dry, dead LR? It's a bit of a mystery to me. That said, When getting LR from a fellow hobbyist or advertised here or on ksl.com, I'm still very choosy about what I take. I pass up a lot more LR than I accept. Just today I was moving some rock around and felt a large soft and squishy something on what had been a small piece of LR. The rock had basically grown into a ball of live Sponge.  This is the kind of animals I give away, yes give away, to people that come to me for LR to help start their new tank. This is the kind of animals I give away, yes give away, to people that come to me for LR to help start their new tank. "Keep your arms and hands inside the tank and enjoy the ride." - L.A.Goon ------------- Reefkeeping Tips, & quick, easy setup tricks: www.utahreefs.com/forum/forum_posts.asp?TID=9244 Pay it forward - become a paid WMAS member
|